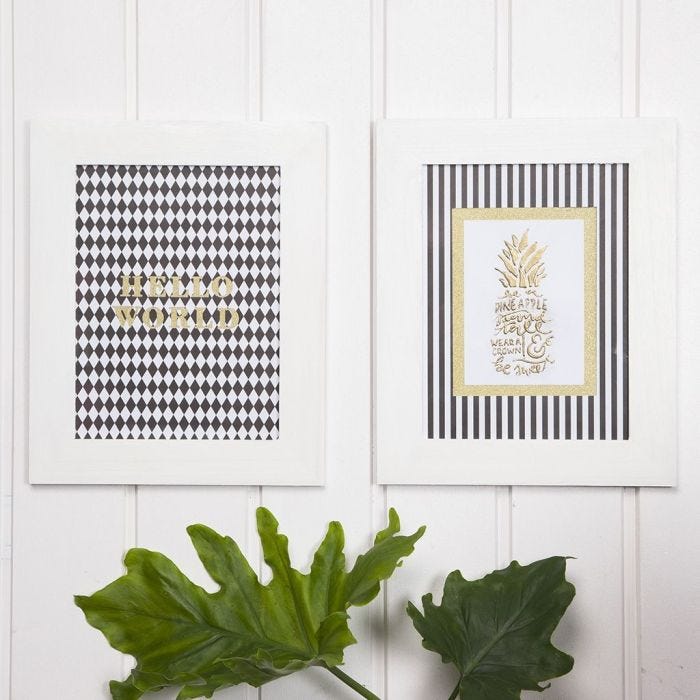
Creative idea
A4 Pictures made in the Die-Cutting Machine
#v14899
A4 pictures in a painted wooden frame with patterned card, die-cut in the die-cutting machine and a glitter paper background. One picture design is embossed and decorated further with embossing powder.
#v14899
How to do it
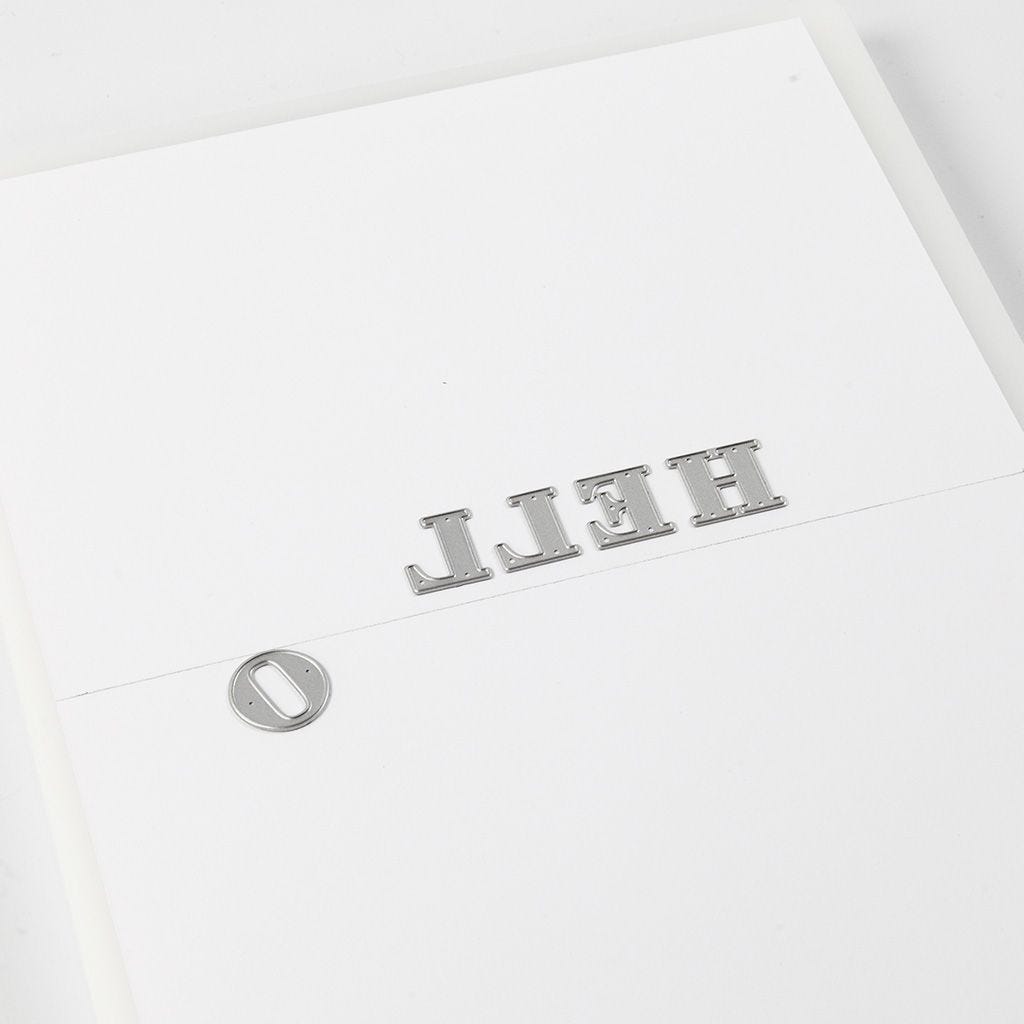
1 Measure and draw a guide line with a pencil on a sheet of paper. Place the letters (dies) mirrored and back to front. Make one word at a time in case a letter is needed for die-cutting more than once. Alternatively purchase two sets of letters for die-cutting. Save the small die-cut-outs from the letters O, R, D and W.
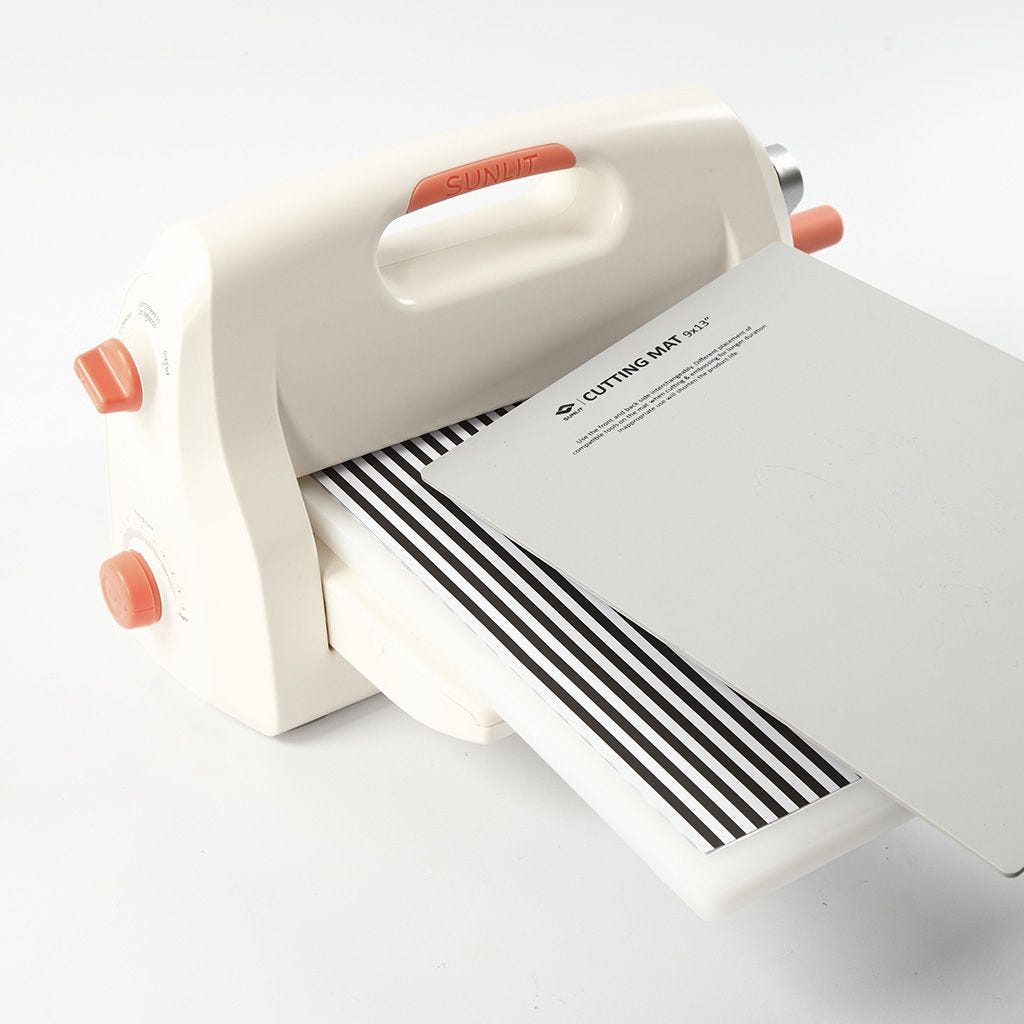
2 Place the thick cutting mat (i.e. the platform) first. Then the paper with the letters and a piece of patterned card with your chosen pattern facing downward and finally the pad (i.e. the cutting mat).
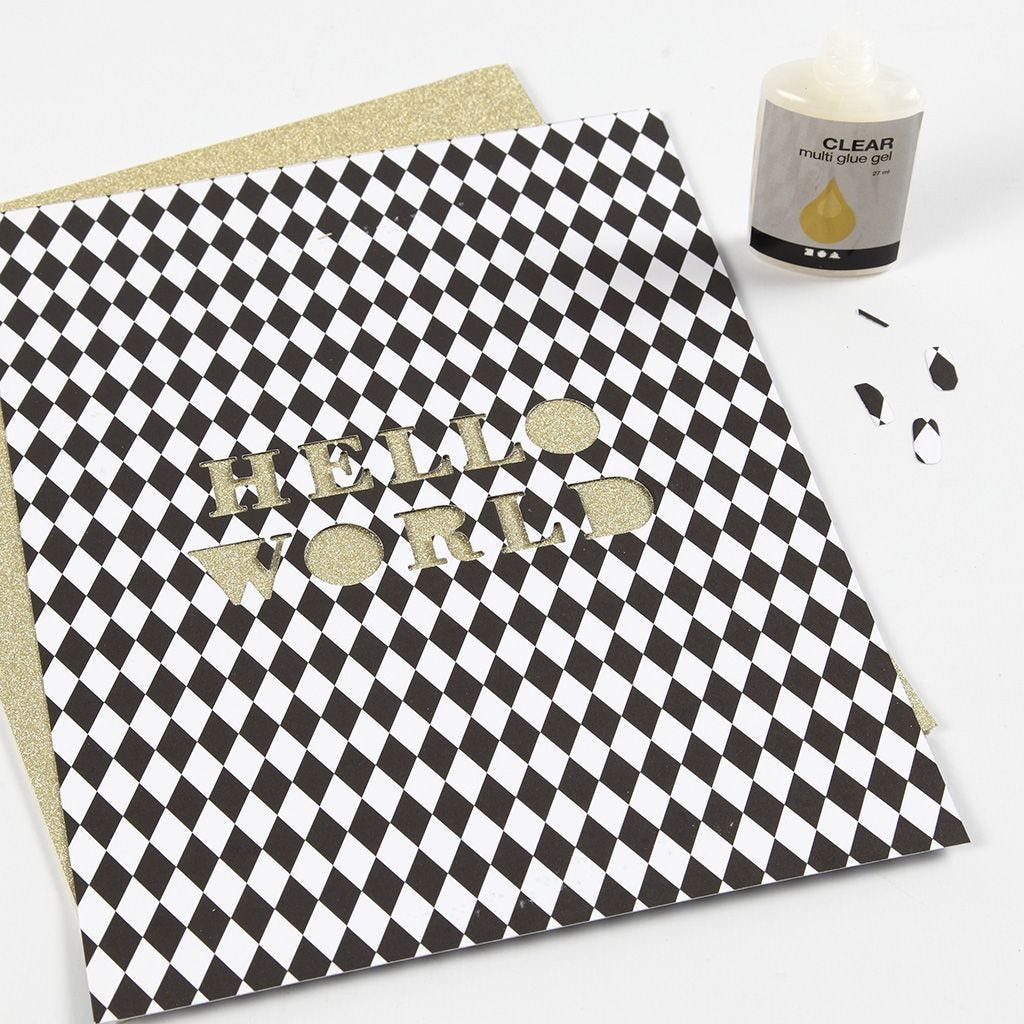
3 Trim card and glitter paper to the same size as the backing of the frame. Glue the parts together; the wooden backing panel, glitter paper and finally the patterned card with the cut-out text. Glue on the small parts that fell off when die-cutting.
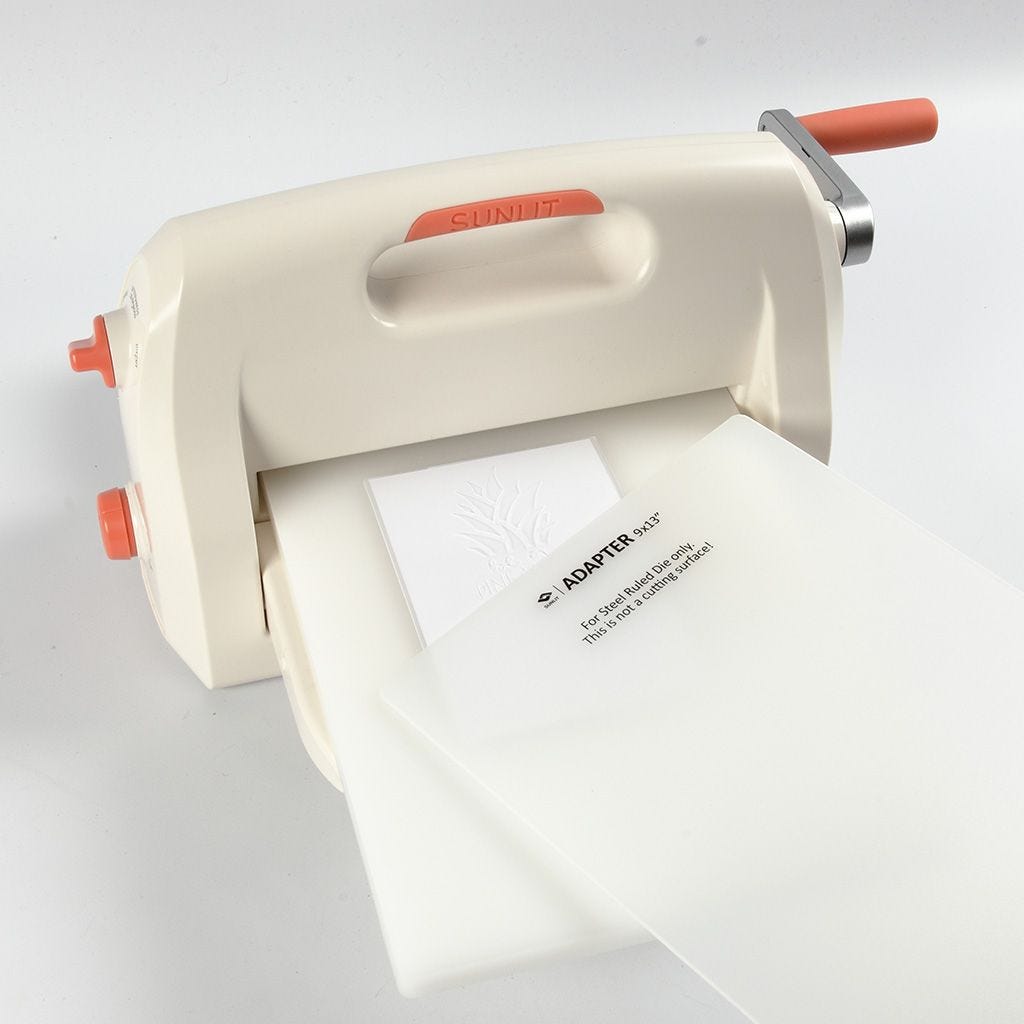
4 Place a piece of A6 card in the embossing folder and run it through the machine, with the adapter placed on top.

5 Gently dab embossing glue onto the design. You may use a brush.
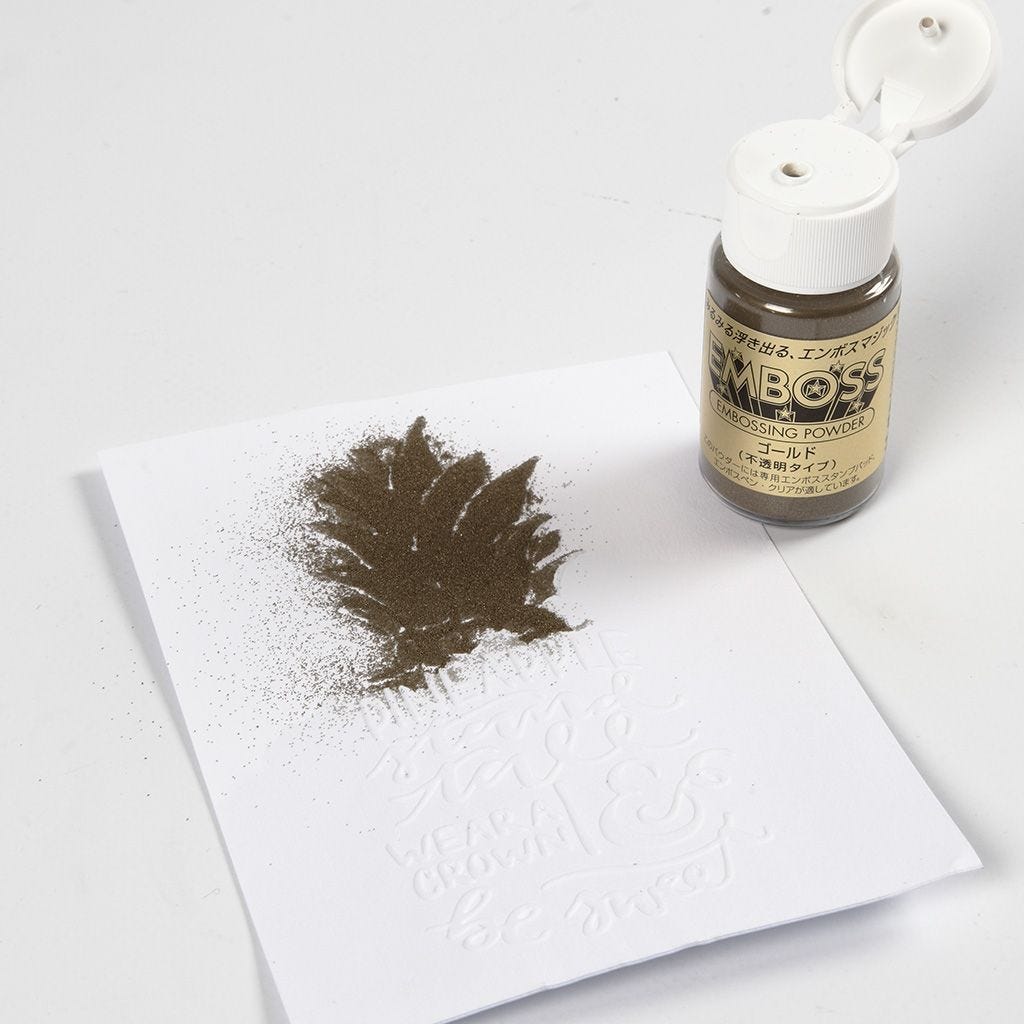
6 Quickly sprinkle embossing powder onto the wet glue and shake off the excess powder or use a small brush.
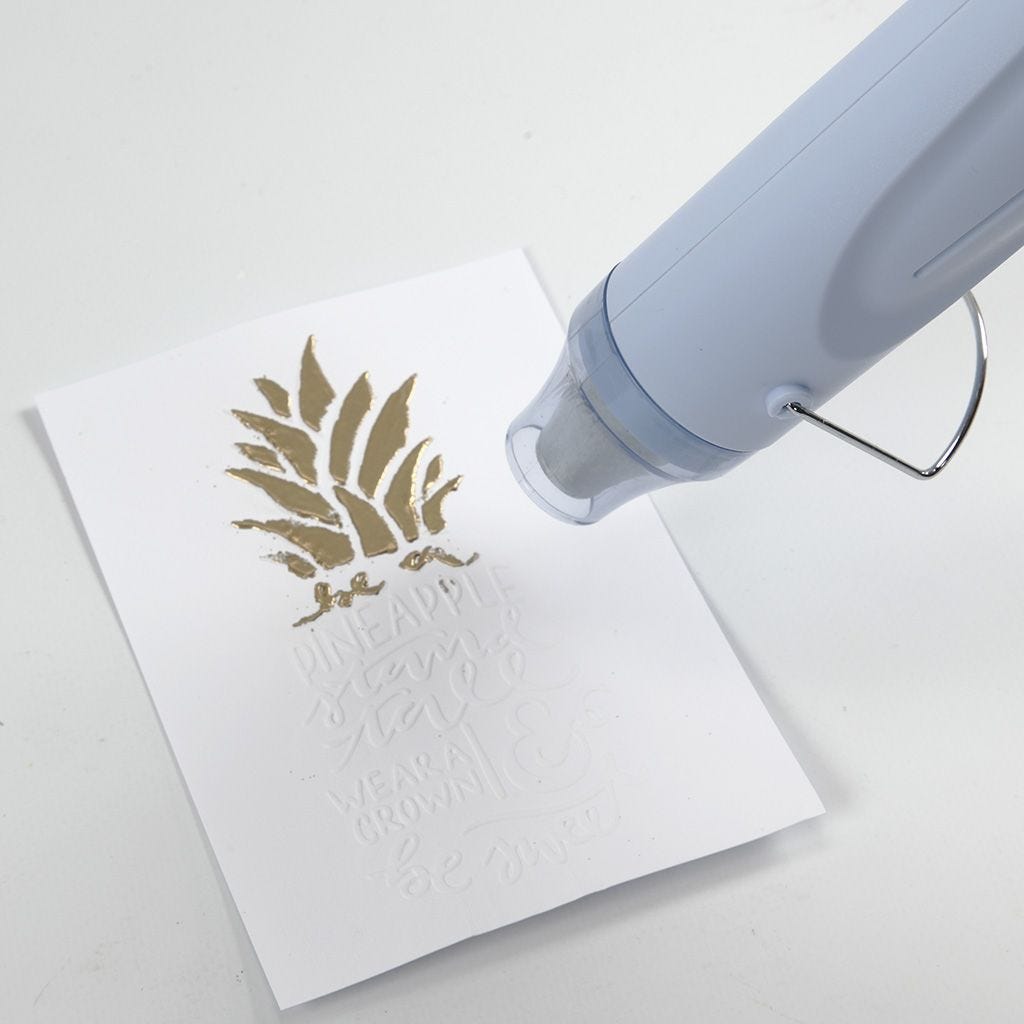
7 Use a heat gun and melt the powder. Cut a frame from the patterned card, approx. 1 cm larger (all round) than the piece of card with the embossed design.
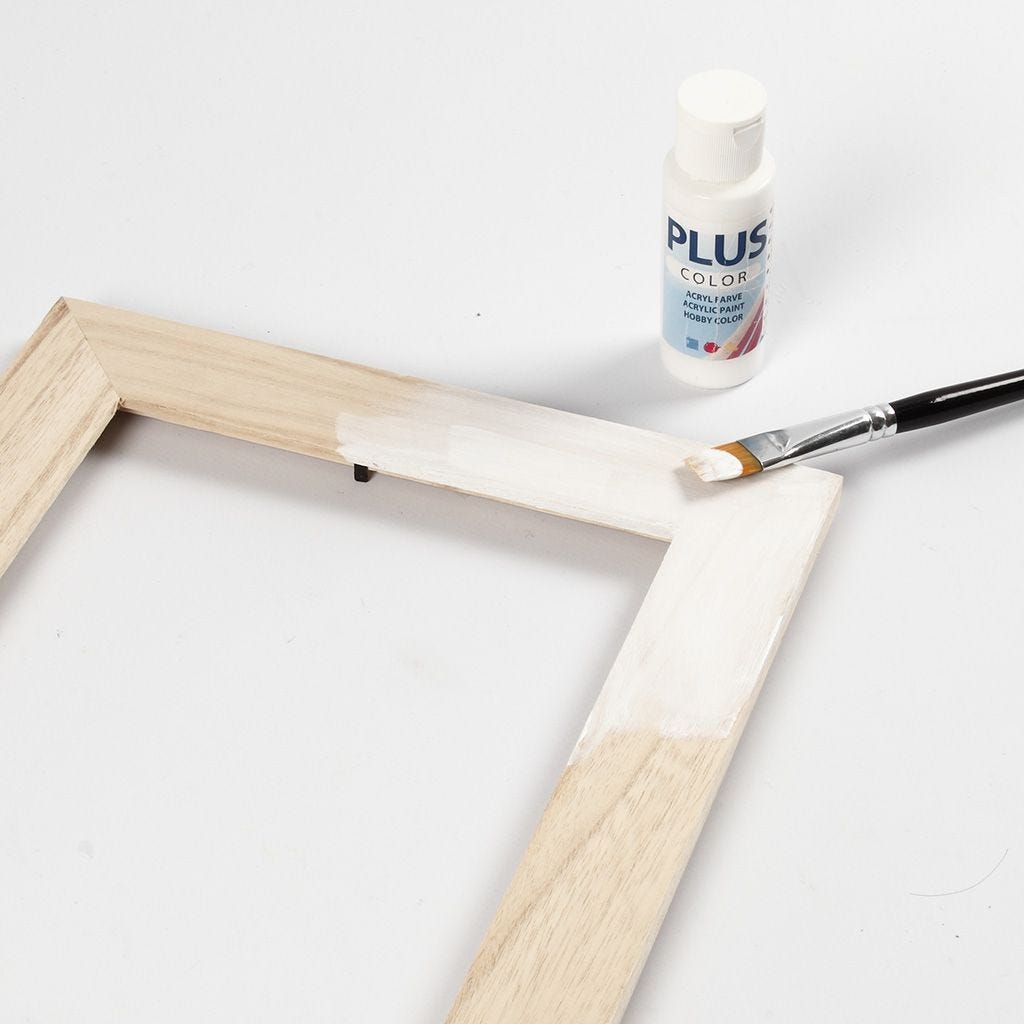
8 Finally paint the frames with craft paint and fit the pictures in the frames.
Also go exploring in