
Creative idea
Calendrier de l’Avent traditionnel à partir d’un organisateur mural en toile
#v15728
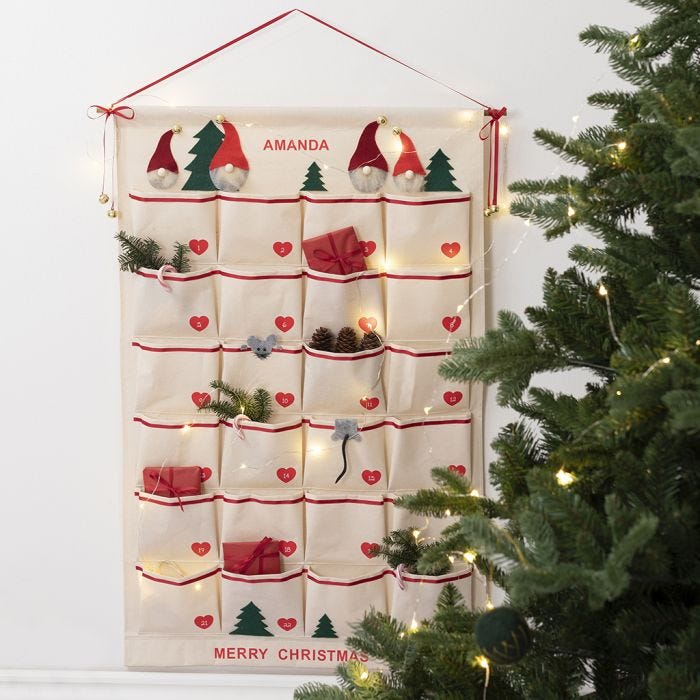
Décorez un organisateur mural avec du feutre, du ruban décoratif et des autocollants à transférer pour créer un calendrier de Noël classique avec 24 poches pour les cadeaux du calendrier de l’Avent.
#v15728
How to do it
1 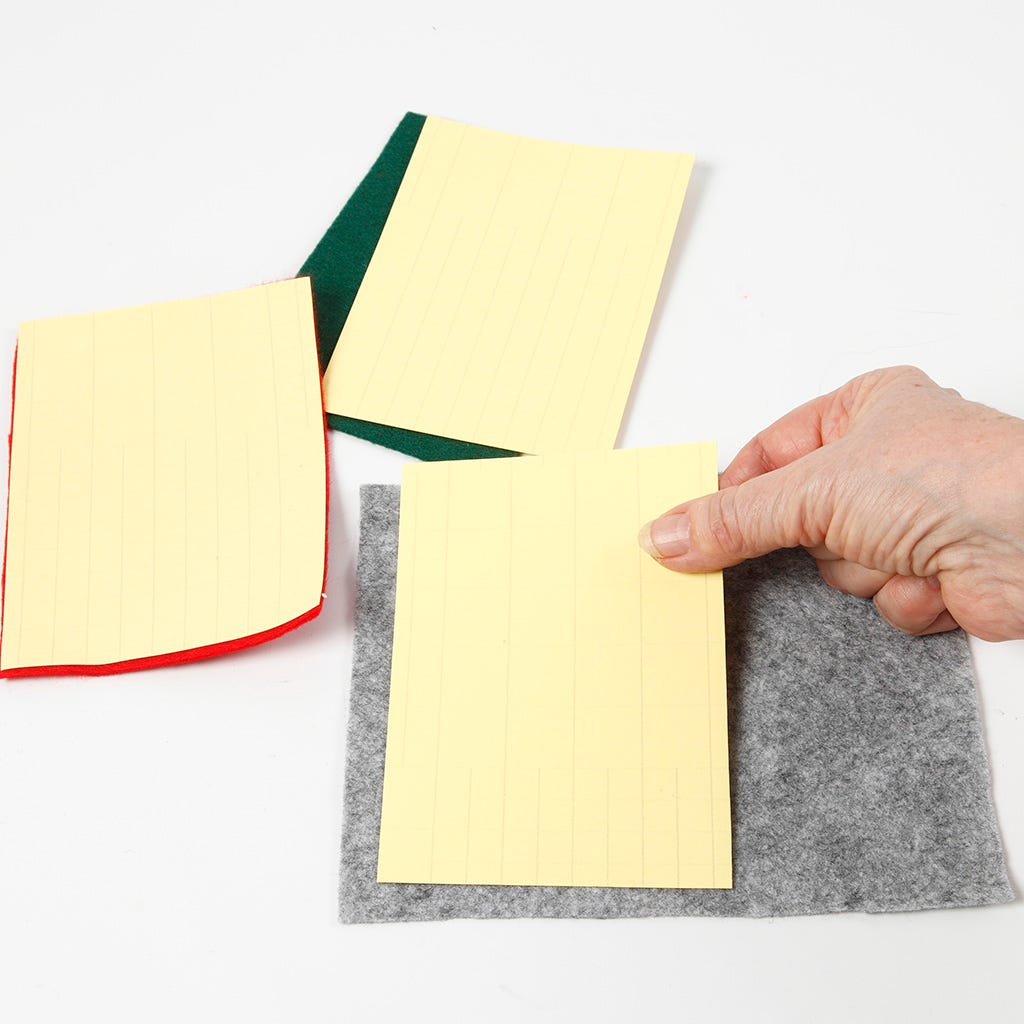 Coupez le ruban adhésif double face en tailles appropriées et fixez-le sur des morceaux de feutre dans les couleurs de votre choix.
Coupez le ruban adhésif double face en tailles appropriées et fixez-le sur des morceaux de feutre dans les couleurs de votre choix.2 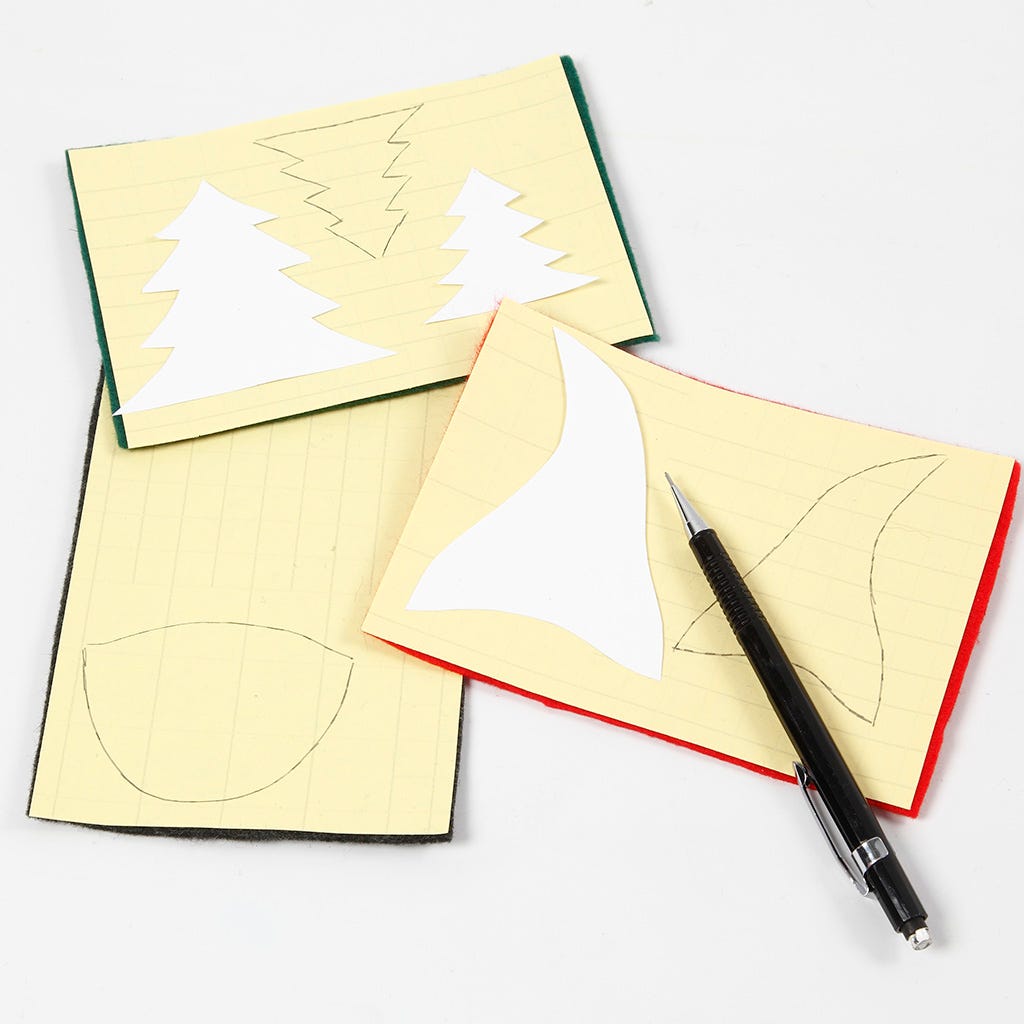 Imprimez les gabarits à partir du fichier PDF disponible sur cette page. Découpez les gabarits individuels et reproduisez-les au dos du ruban adhésif double face.
Imprimez les gabarits à partir du fichier PDF disponible sur cette page. Découpez les gabarits individuels et reproduisez-les au dos du ruban adhésif double face.3 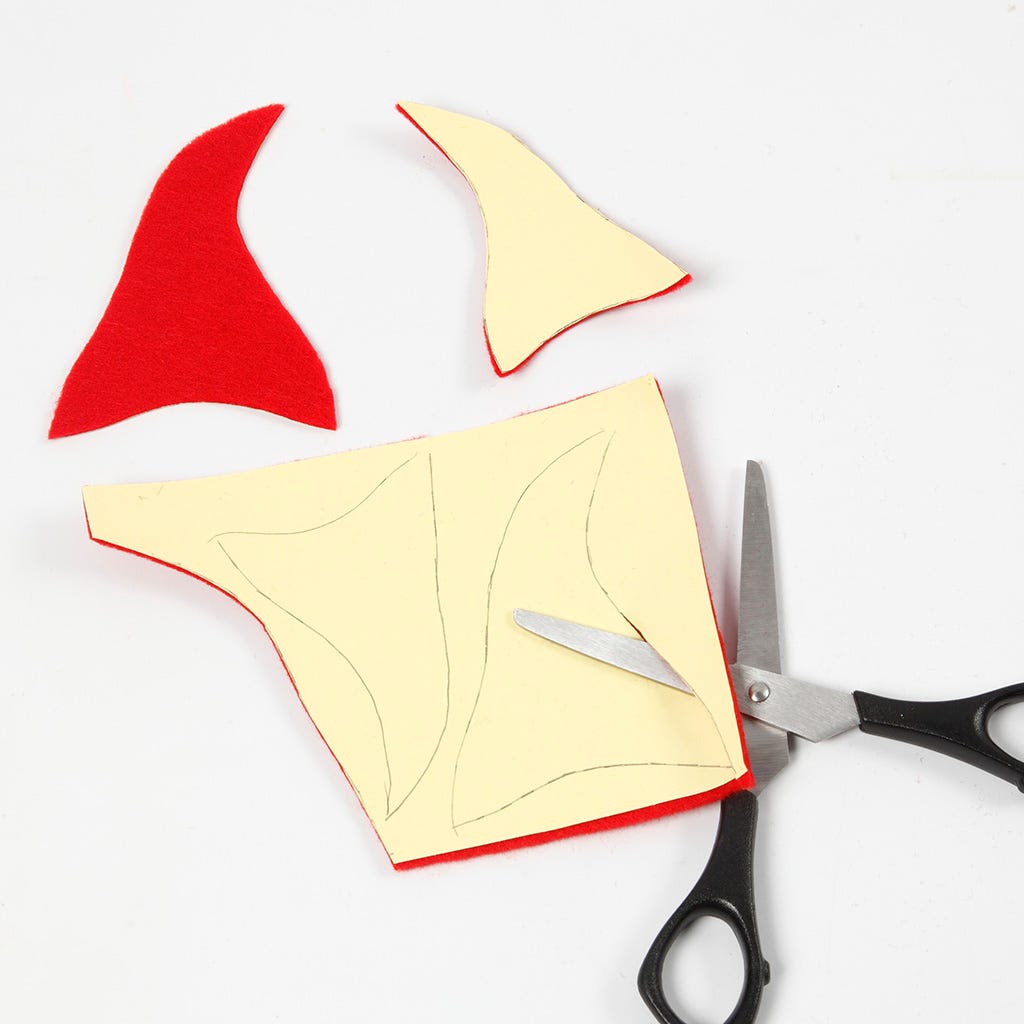 Découpez les motifs.
Découpez les motifs.4 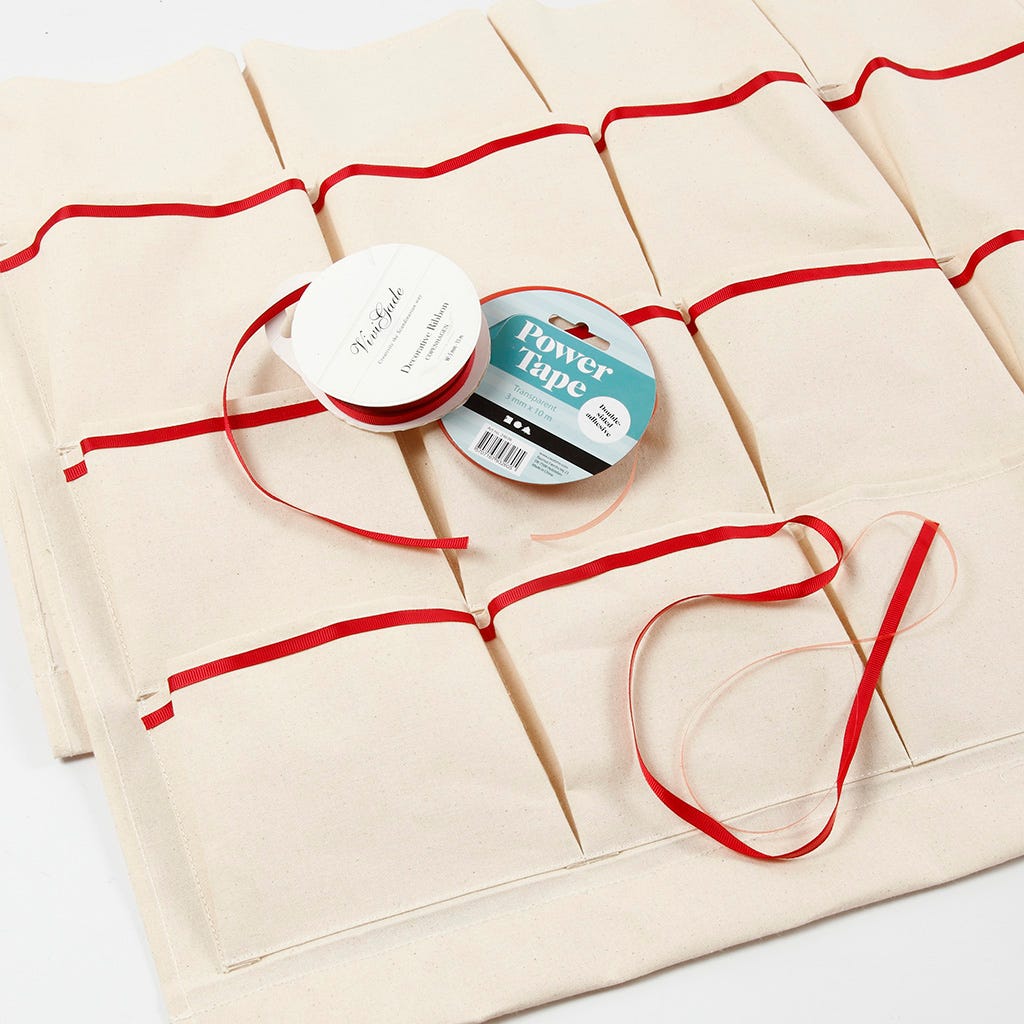 Coupez des morceaux de ruban décoratif, chacun mesurant environ 80 cm. Fixez du ruban adhésif double face sur le ruban et attachez le ruban sur les poches juste sous le bord supérieur, comme montré sur la photo.
Coupez des morceaux de ruban décoratif, chacun mesurant environ 80 cm. Fixez du ruban adhésif double face sur le ruban et attachez le ruban sur les poches juste sous le bord supérieur, comme montré sur la photo.5 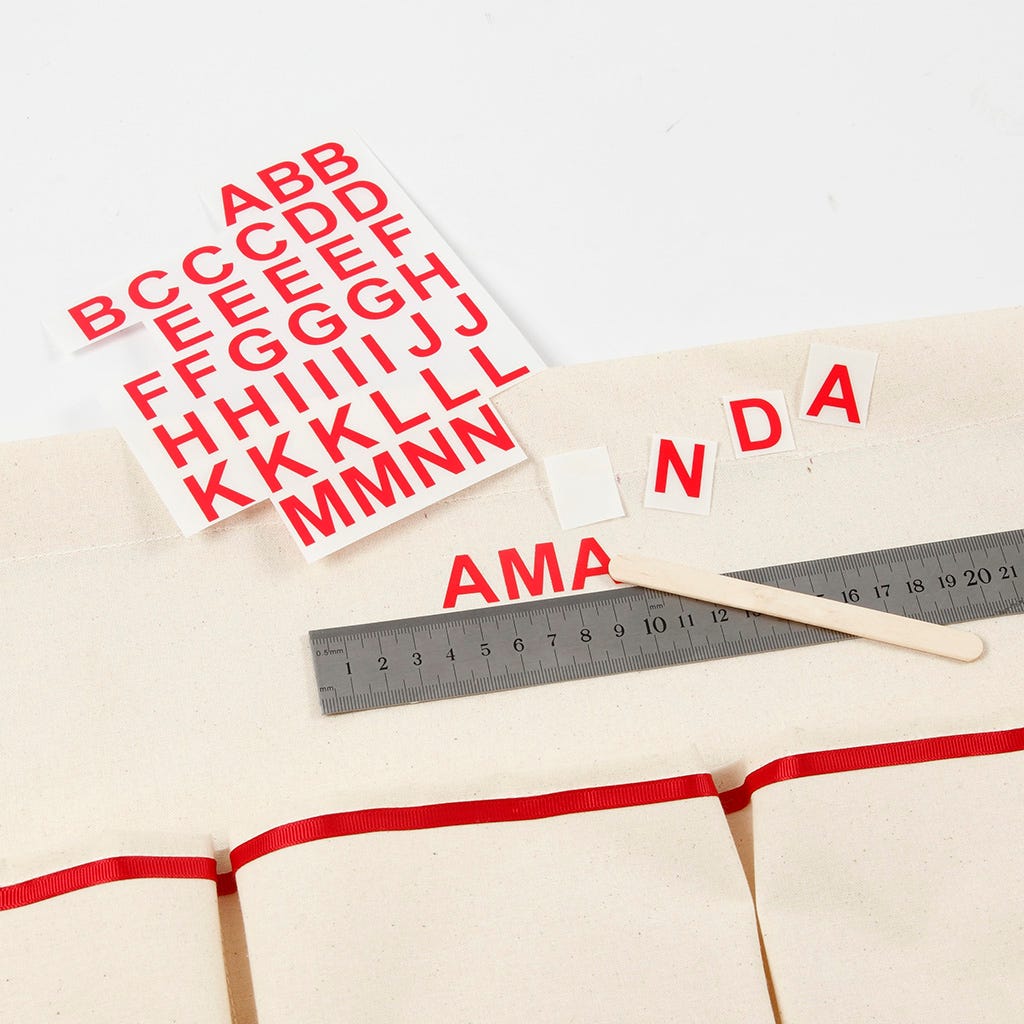 Détachez les lettres de la feuille une par une pour former le nom de votre choix. Appliquez les lettres autocollantes sur le tissu. Suivez les instructions sur l’emballage.
Détachez les lettres de la feuille une par une pour former le nom de votre choix. Appliquez les lettres autocollantes sur le tissu. Suivez les instructions sur l’emballage.6  Appliquez les numéros de l’Avent en forme de cœur de 1 à 24 sur les poches.
Appliquez les numéros de l’Avent en forme de cœur de 1 à 24 sur les poches.7 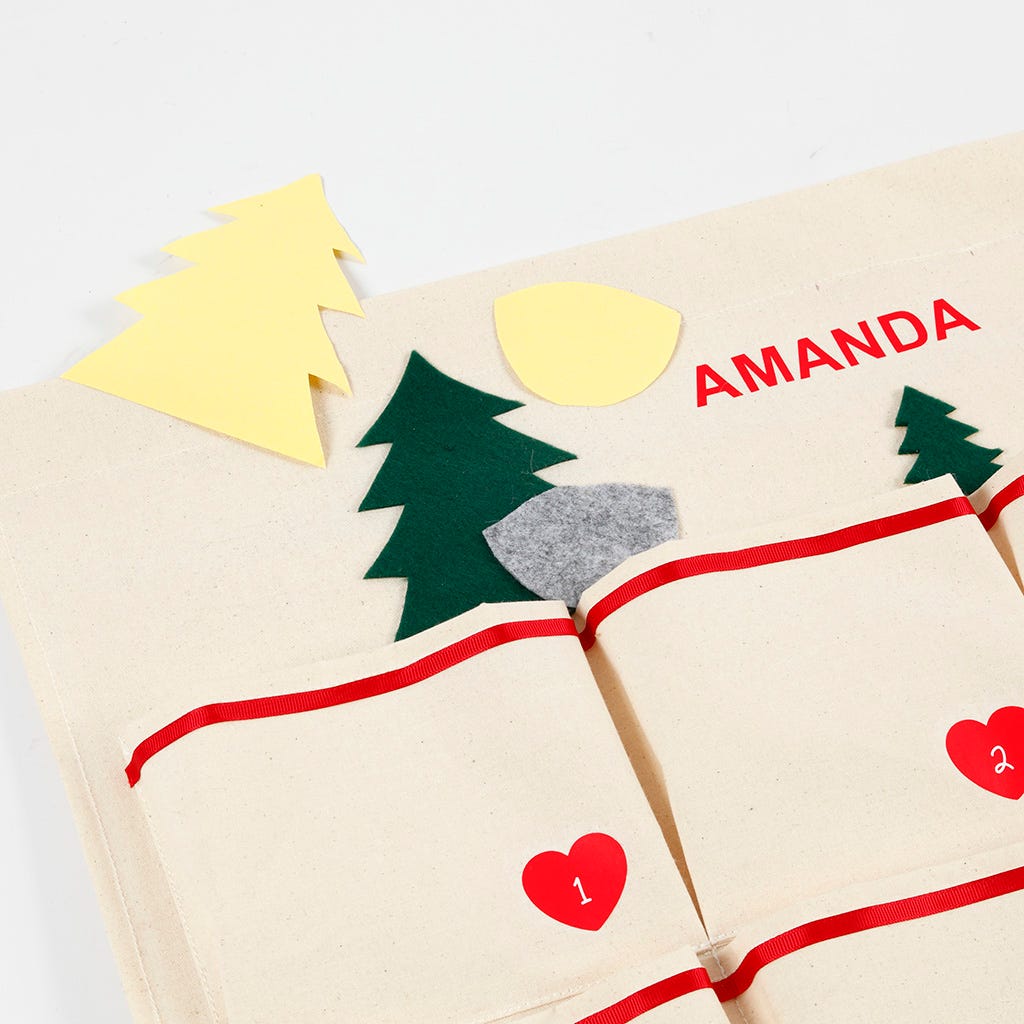 Retirez le papier protecteur du ruban adhésif double face. Fixez les motifs sur l’organisateur en tissu. Attachez les chapeaux à la fin.
Retirez le papier protecteur du ruban adhésif double face. Fixez les motifs sur l’organisateur en tissu. Attachez les chapeaux à la fin.8 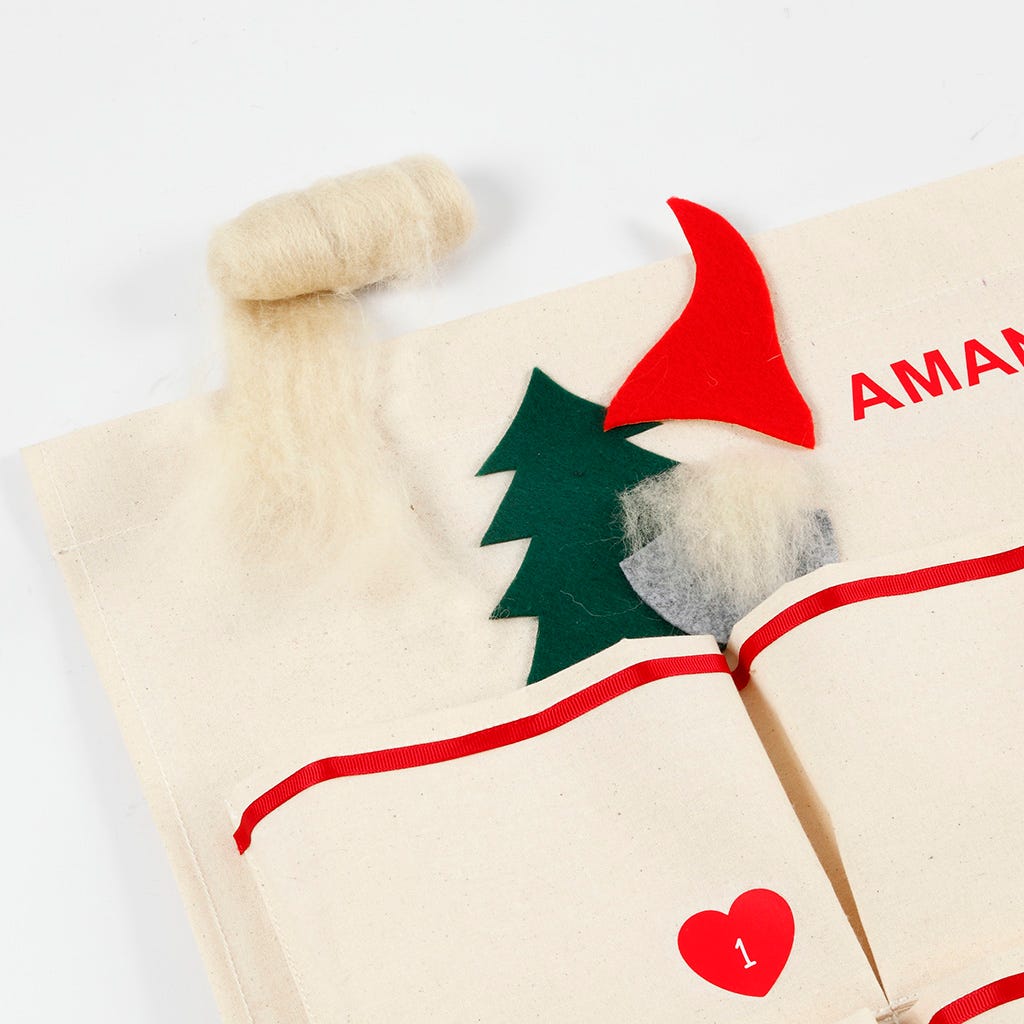 Déchirez un petit morceau de laine peignée. Coupez-le en haut et placez-le sur le morceau de feutre gris. Fixez le chapeau rouge de manière à ce qu’il couvre les 2 mm supérieurs du feutre gris.
Déchirez un petit morceau de laine peignée. Coupez-le en haut et placez-le sur le morceau de feutre gris. Fixez le chapeau rouge de manière à ce qu’il couvre les 2 mm supérieurs du feutre gris.9 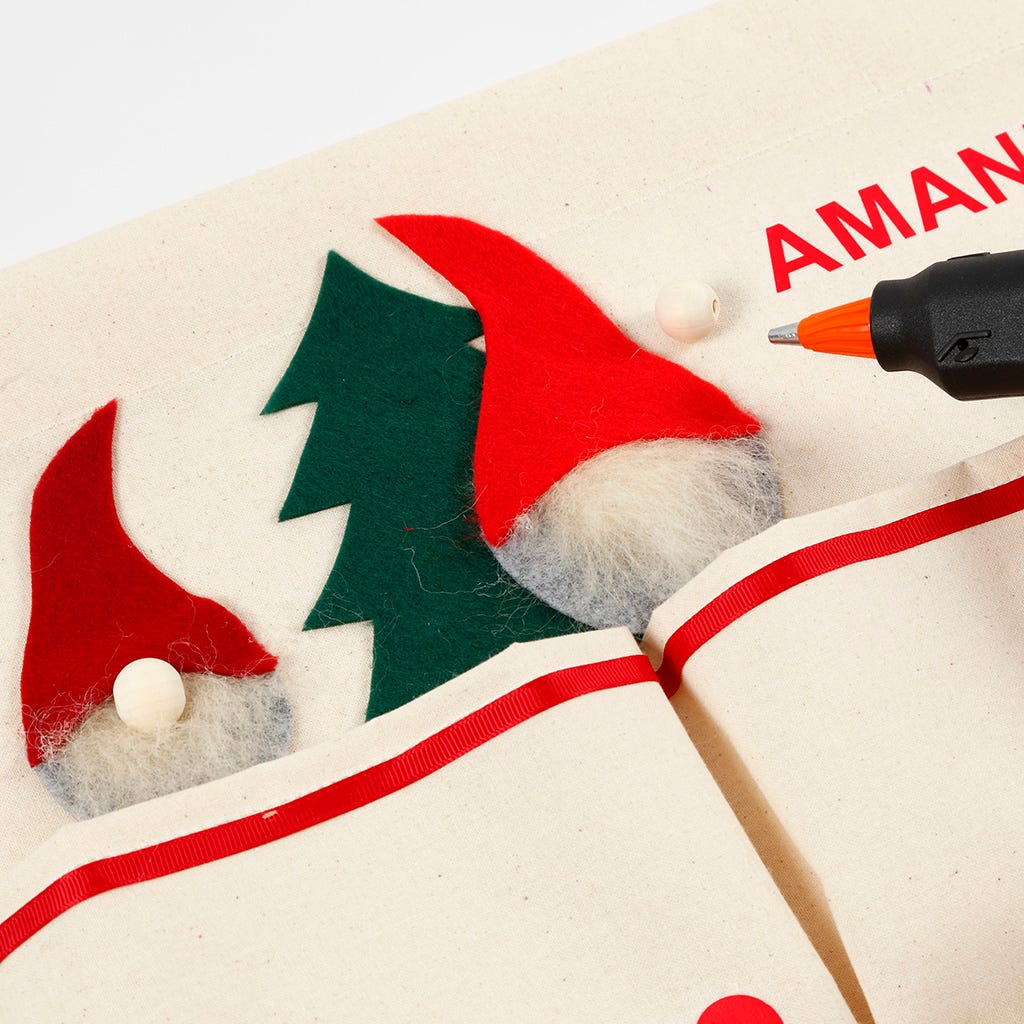 Fixez des perles en bois pour les nez à l’aide d’un pistolet à colle.
Fixez des perles en bois pour les nez à l’aide d’un pistolet à colle.10 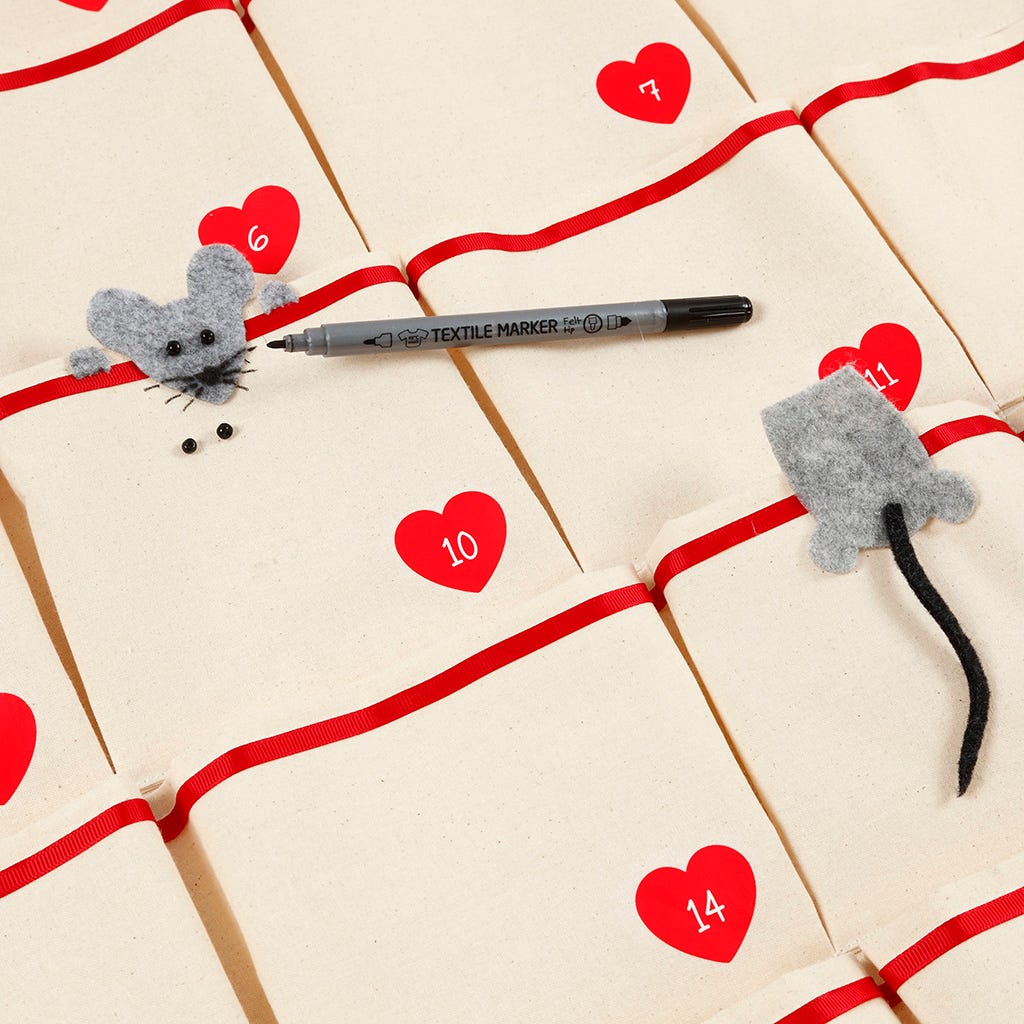 Souris 1 : Coupez la tête de la souris dans du feutre. Fixez du feutre sur la partie supérieure de la tête, de manière à ce qu’elle soit repliée. Cousez des perles de rocaille pour les yeux. Collez un morceau de feutre noir pour le nez. Collez la souris et ses pattes sur le calendrier de l’Avent. Dessinez les moustaches avec un marqueur textile.
Souris 2 : Coupez le corps de la souris dans du feutre. Laissez le corps dépasser légèrement du bord et repliez-le à l’intérieur de la poche lors de la fixation. Roulez un morceau étroit de feutre noir avec du ruban adhésif double face pour le maintenir en place. Coupez-le pour former une queue et fixez-la sur le corps avec un pistolet à colle.
Souris 1 : Coupez la tête de la souris dans du feutre. Fixez du feutre sur la partie supérieure de la tête, de manière à ce qu’elle soit repliée. Cousez des perles de rocaille pour les yeux. Collez un morceau de feutre noir pour le nez. Collez la souris et ses pattes sur le calendrier de l’Avent. Dessinez les moustaches avec un marqueur textile.
Souris 2 : Coupez le corps de la souris dans du feutre. Laissez le corps dépasser légèrement du bord et repliez-le à l’intérieur de la poche lors de la fixation. Roulez un morceau étroit de feutre noir avec du ruban adhésif double face pour le maintenir en place. Coupez-le pour former une queue et fixez-la sur le corps avec un pistolet à colle.11  Collez des clochettes sur les pointes des chapeaux des lutins.
Collez des clochettes sur les pointes des chapeaux des lutins.12 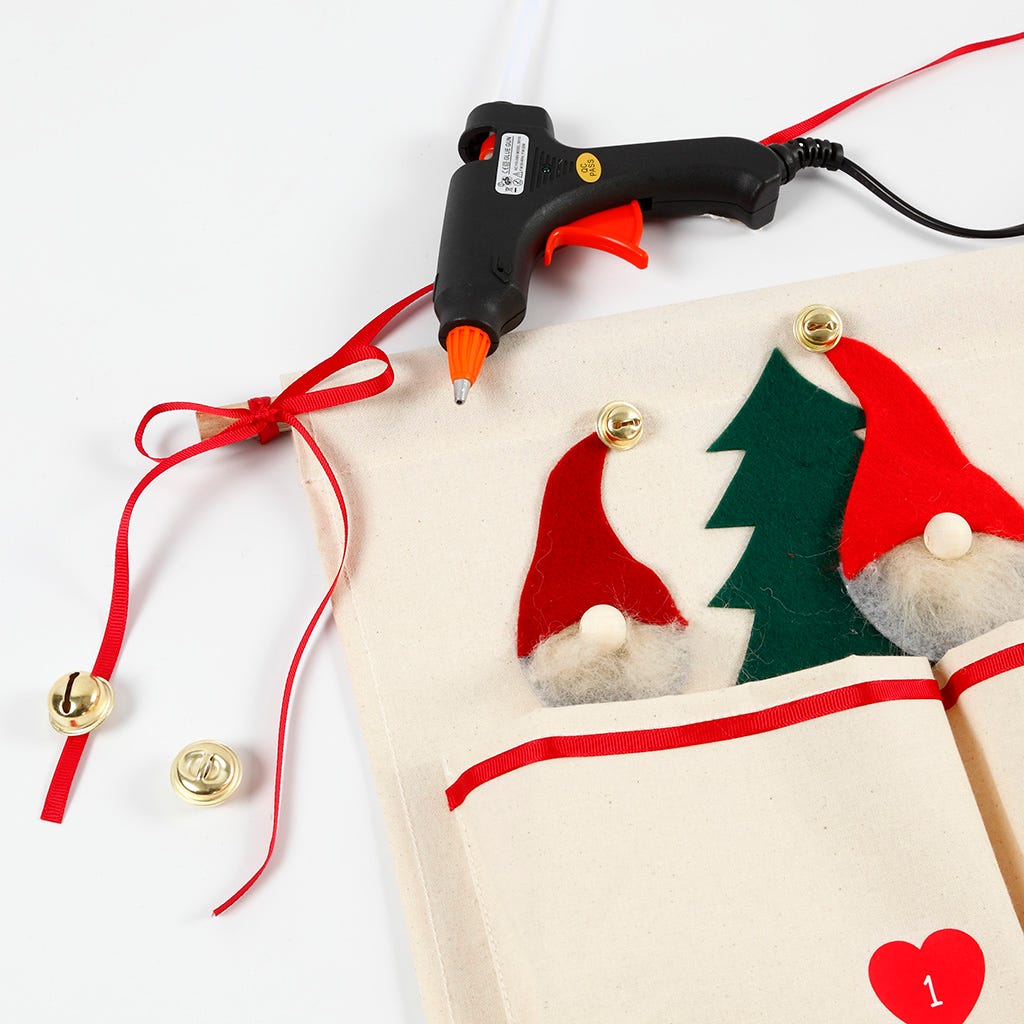 Attachez un morceau de ruban décoratif aux deux extrémités du bâton. Coupez les extrémités et collez le nœud à l’arrière du bâton. Coupez un autre morceau de ruban décoratif pour le nœud. Faites le nœud sur le dessus du premier nœud. Collez des clochettes aux deux extrémités du ruban décoratif.
Attachez un morceau de ruban décoratif aux deux extrémités du bâton. Coupez les extrémités et collez le nœud à l’arrière du bâton. Coupez un autre morceau de ruban décoratif pour le nœud. Faites le nœud sur le dessus du premier nœud. Collez des clochettes aux deux extrémités du ruban décoratif.13 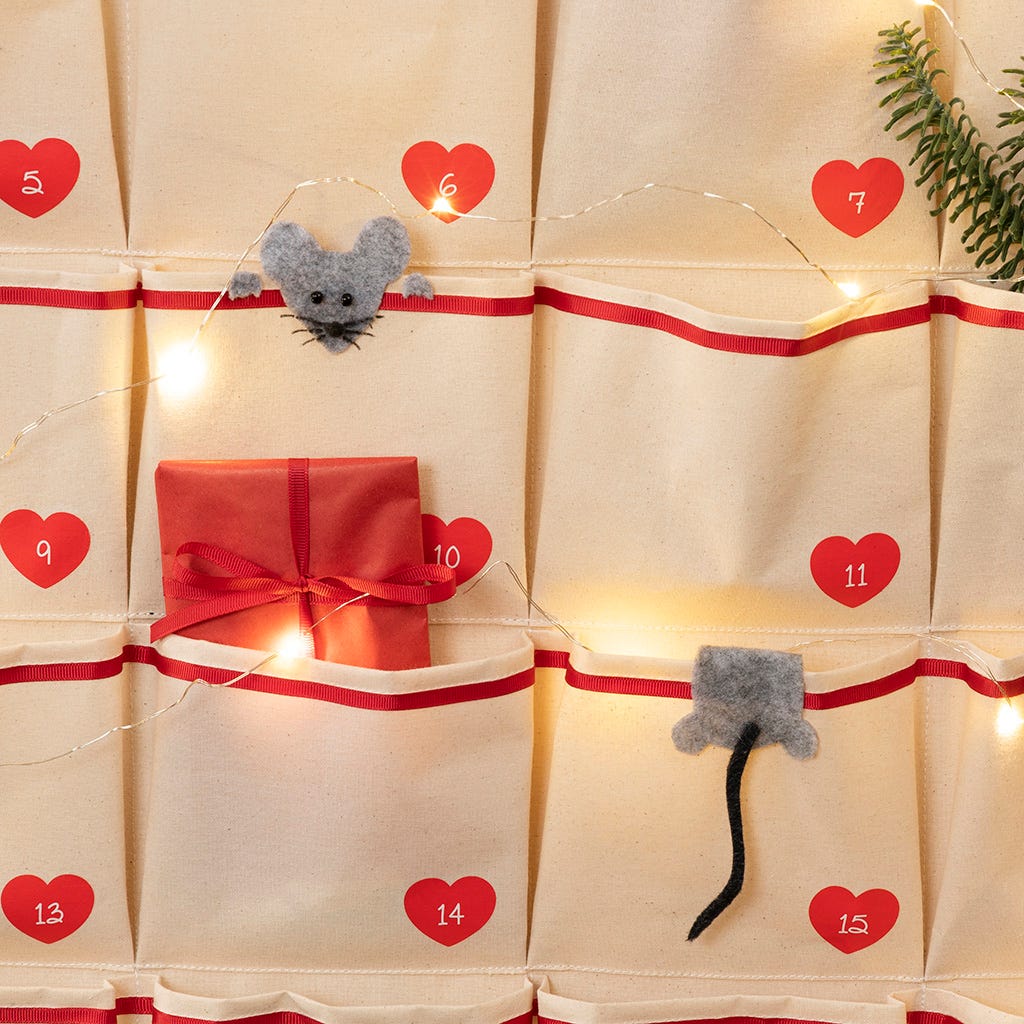 Vous pouvez décorer avec des lumières LED.
Vous pouvez décorer avec des lumières LED.Another example 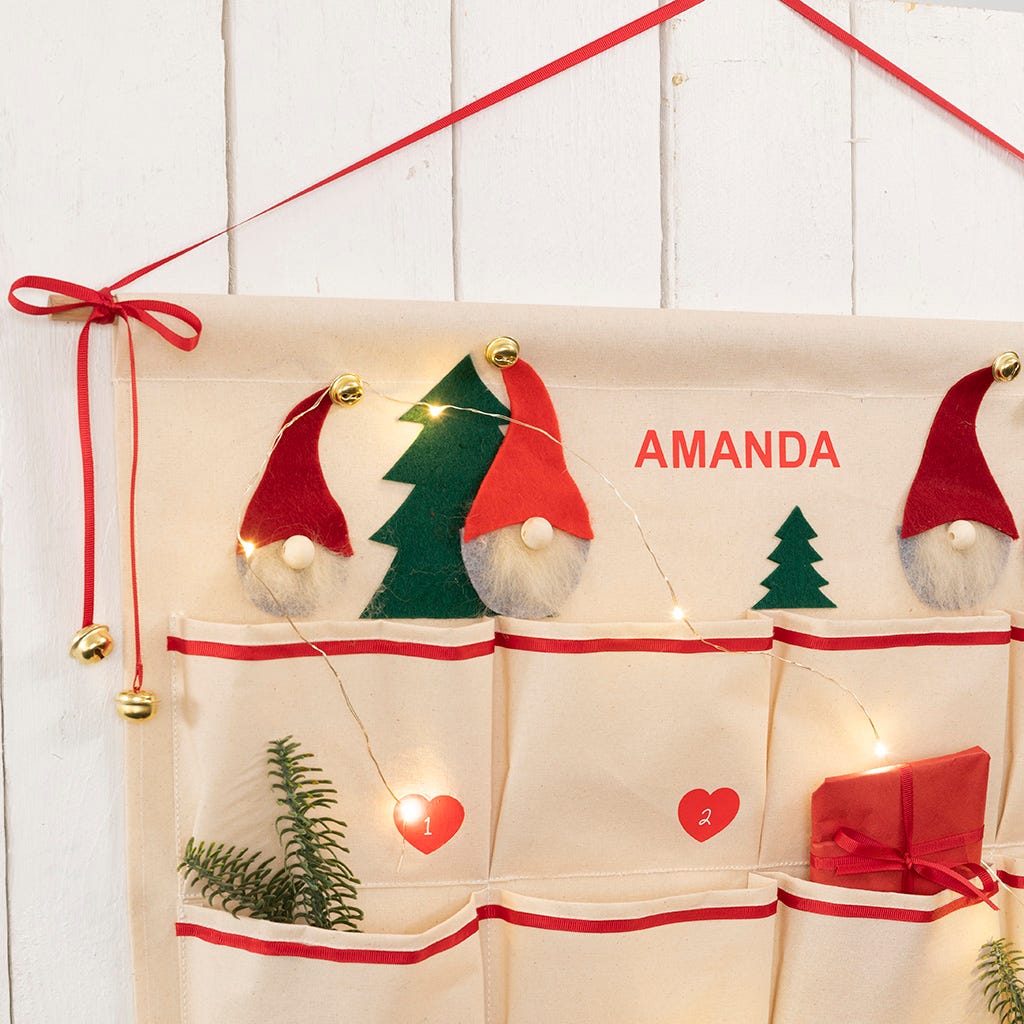 -
-
-Template  -
-
-Also go exploring in
