
New
Creative idea
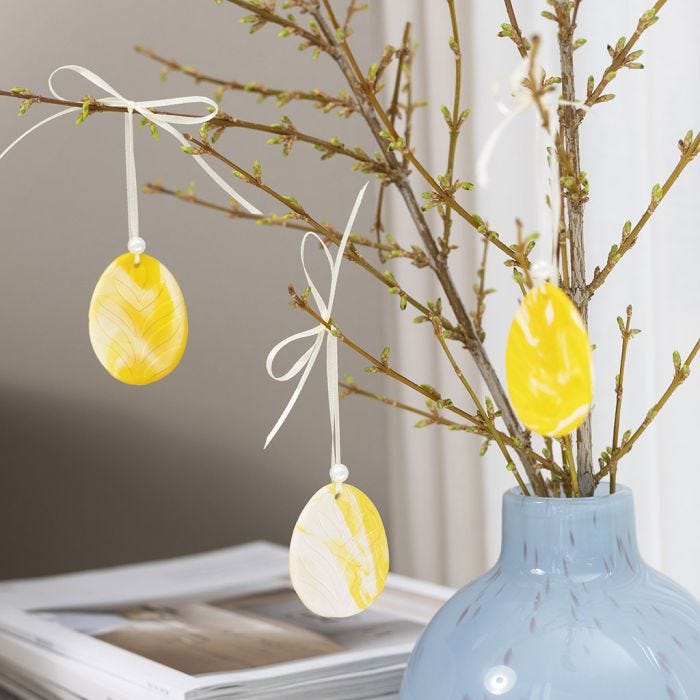
Marbled eggs in fine clay polymer
#v16982
Create spring’s most charming Easter eggs to hang from a bouquet of branches. Roll different colours of polymer clay into small balls, knead them together to create a beautiful white and yellow marble effect. Use stencils and cutters to add a lovely design on each egg.
#v16982
How to do it
1  Knead the two colours of fine clay polymer for at least 4 minutes.
Knead the two colours of fine clay polymer for at least 4 minutes.2  Roll lots of small balls in white and yellow.
Roll lots of small balls in white and yellow.3  Gather all the balls.
Gather all the balls.4  Knead gently to create a marbled effect.
Knead gently to create a marbled effect.5  Roll out the marbled fine clay polymer to a thickness of around 3 mm.
Roll out the marbled fine clay polymer to a thickness of around 3 mm.6  Place your stencil face down on the fine clay polymer piece and roll over the pattern.
Place your stencil face down on the fine clay polymer piece and roll over the pattern.7  Use the cutter to cut out the egg shape.
Use the cutter to cut out the egg shape.8  Make a hole at the top of the egg with the piercing tool, making sure the hole is large enough by wiggling the tool slightly.
Make a hole at the top of the egg with the piercing tool, making sure the hole is large enough by wiggling the tool slightly.9  Preheat the oven to 120 degrees for 10 minutes. Place the jewellery clay in the oven it is preheated and bake for 18 minutes.
Preheat the oven to 120 degrees for 10 minutes. Place the jewellery clay in the oven it is preheated and bake for 18 minutes.10  Cut approx. 30 cm of satin ribbon and pull it through the egg.
Cut approx. 30 cm of satin ribbon and pull it through the egg.11  Thread the beads onto the ribbon.
Thread the beads onto the ribbon.12  Make a loop for hanging by tying a knot.
Make a loop for hanging by tying a knot.13  Finish by tying a bow and cutting off the excess ribbon. Repeat the process for the other eggs.
Finish by tying a bow and cutting off the excess ribbon. Repeat the process for the other eggs.Also go exploring in
