
Creative idea
Invitations and table decorations in pink/rose
#v14423
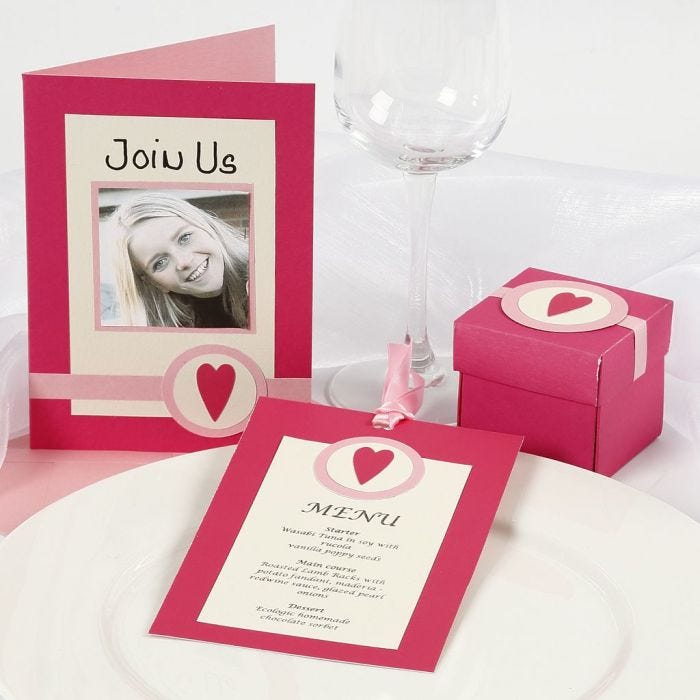
In addition to its printed portrait, the folded card has been decorated with friezes, hearts and circles made of card and textured paper. The menu card and box decoration have been made in the same style. All from the pink/rose Happy Moments collection.
#v14423
How to do it
1 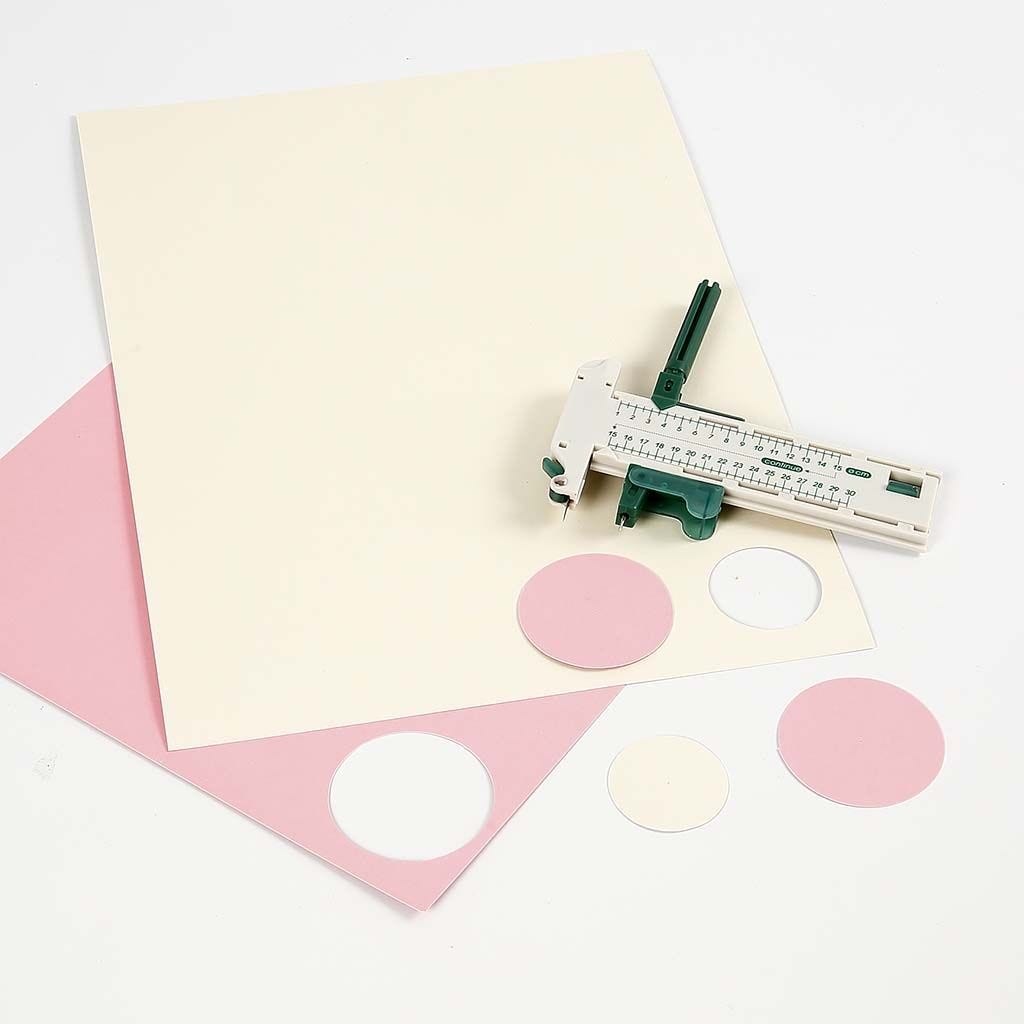 Cut circles out of off-white (largest circle) and rose (smallest circle) for each item to be decorated. E.g. use a circle cutter or use a stencil.
Cut circles out of off-white (largest circle) and rose (smallest circle) for each item to be decorated. E.g. use a circle cutter or use a stencil.2 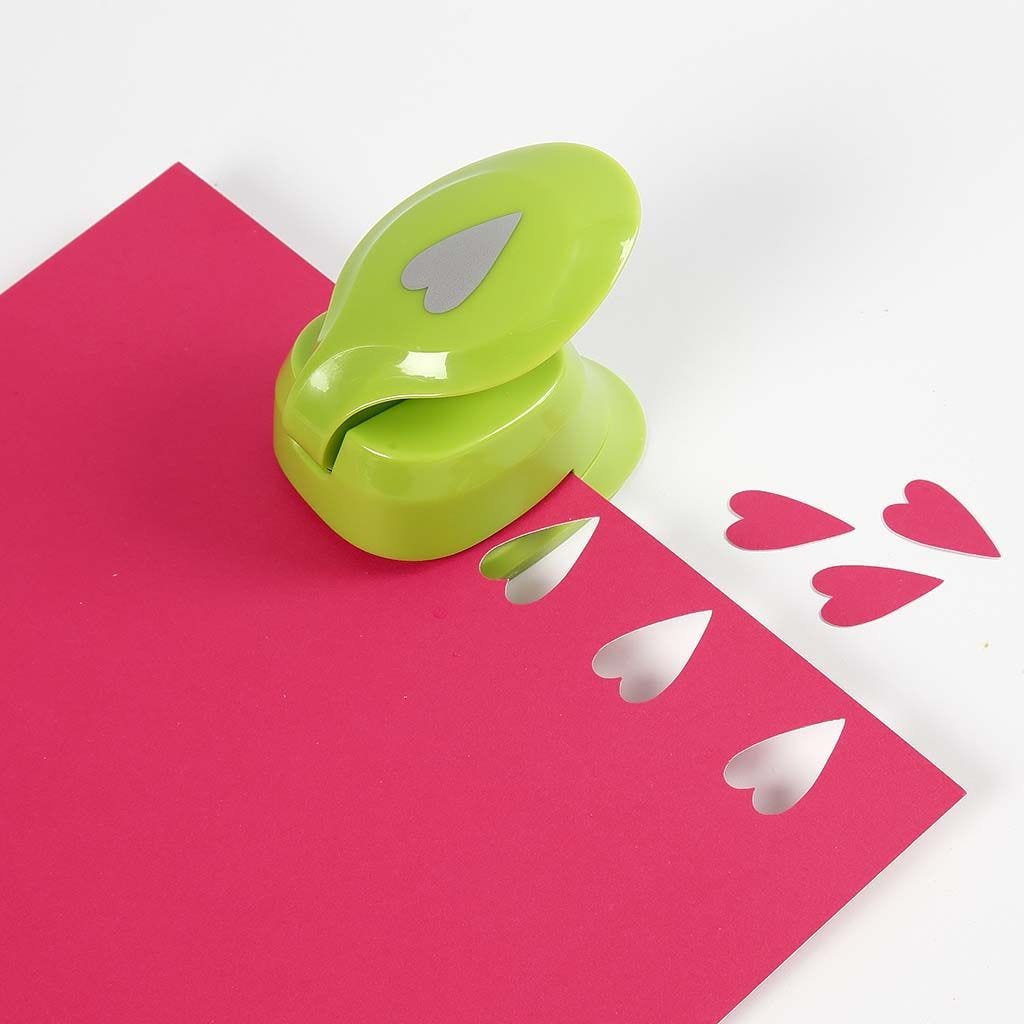 Using the dark side of the double-sided card, cut out hearts with the paper punch.
Using the dark side of the double-sided card, cut out hearts with the paper punch.3 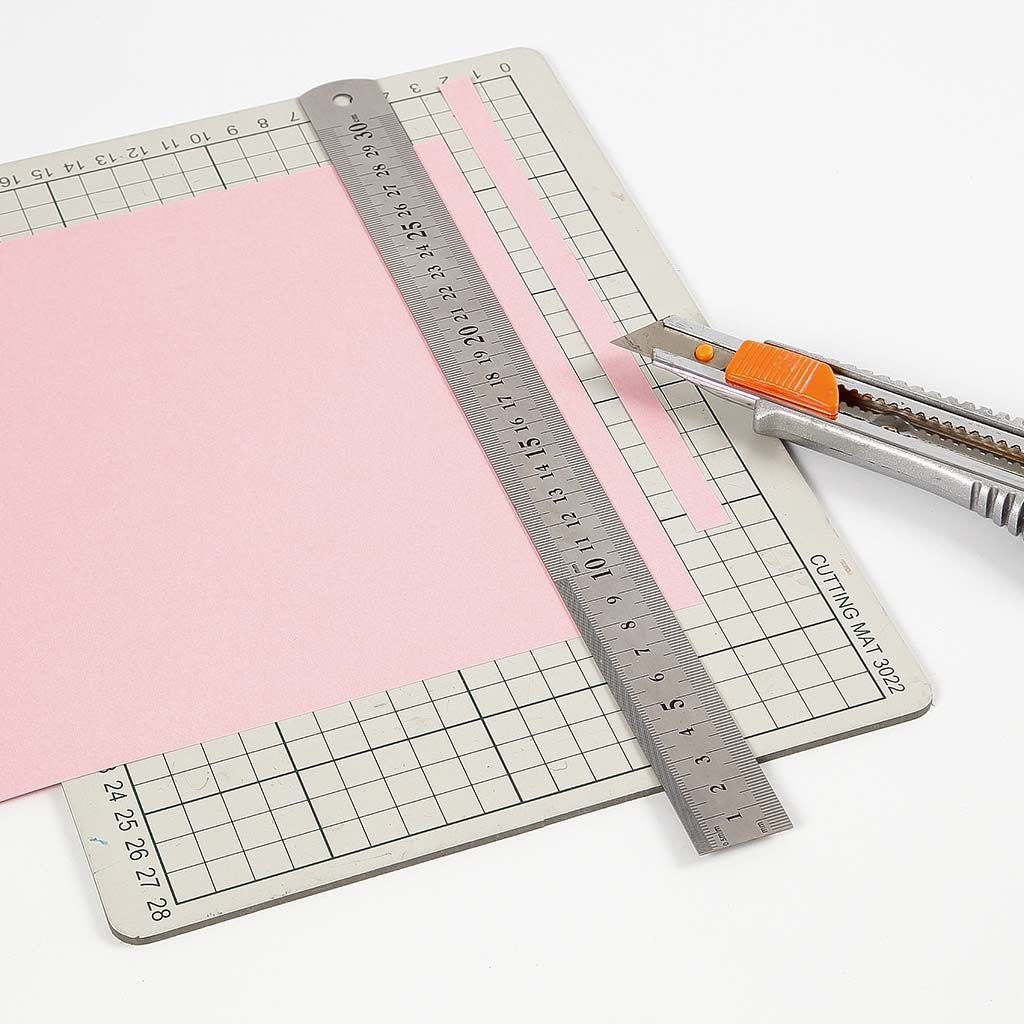 On the light side of the textured paper, measure 1 cm strips and cut with a craft knife. NB! You may also like to cut out a square to frame the printed portrait on the invitation. (See step 6).
On the light side of the textured paper, measure 1 cm strips and cut with a craft knife. NB! You may also like to cut out a square to frame the printed portrait on the invitation. (See step 6).4 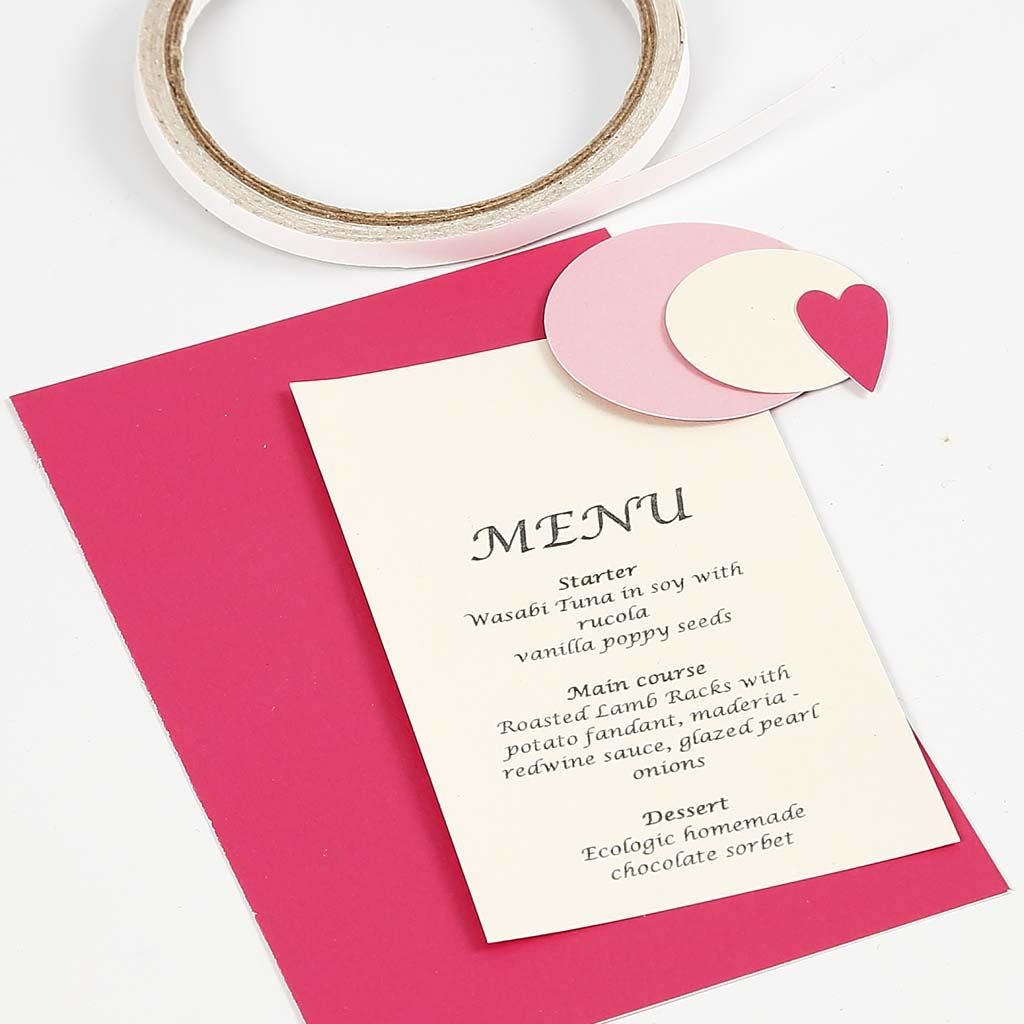 Menu card: Using the dark side of the double-sided card, cut out a 10x15 cm piece. Put off-white textured paper in the printer and print out the menu on it. Cut out and attach all the different parts using double-sided tape.
Menu card: Using the dark side of the double-sided card, cut out a 10x15 cm piece. Put off-white textured paper in the printer and print out the menu on it. Cut out and attach all the different parts using double-sided tape.5 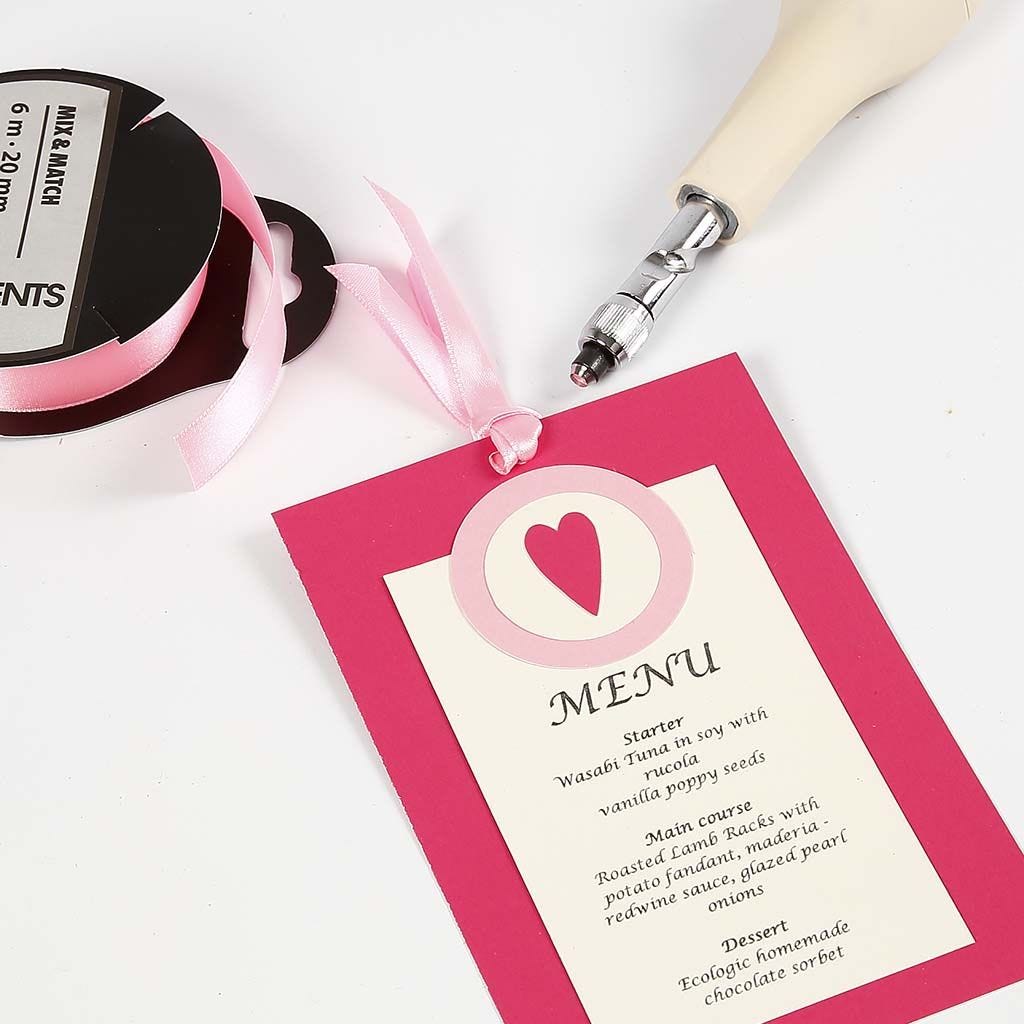 Make a hole big enough for a wide ribbon at the top of the menu. Here we've used a screw punch (2 holes next to each other). Fold the ribbon in half and tie to the hole as shown.
Make a hole big enough for a wide ribbon at the top of the menu. Here we've used a screw punch (2 holes next to each other). Fold the ribbon in half and tie to the hole as shown.6 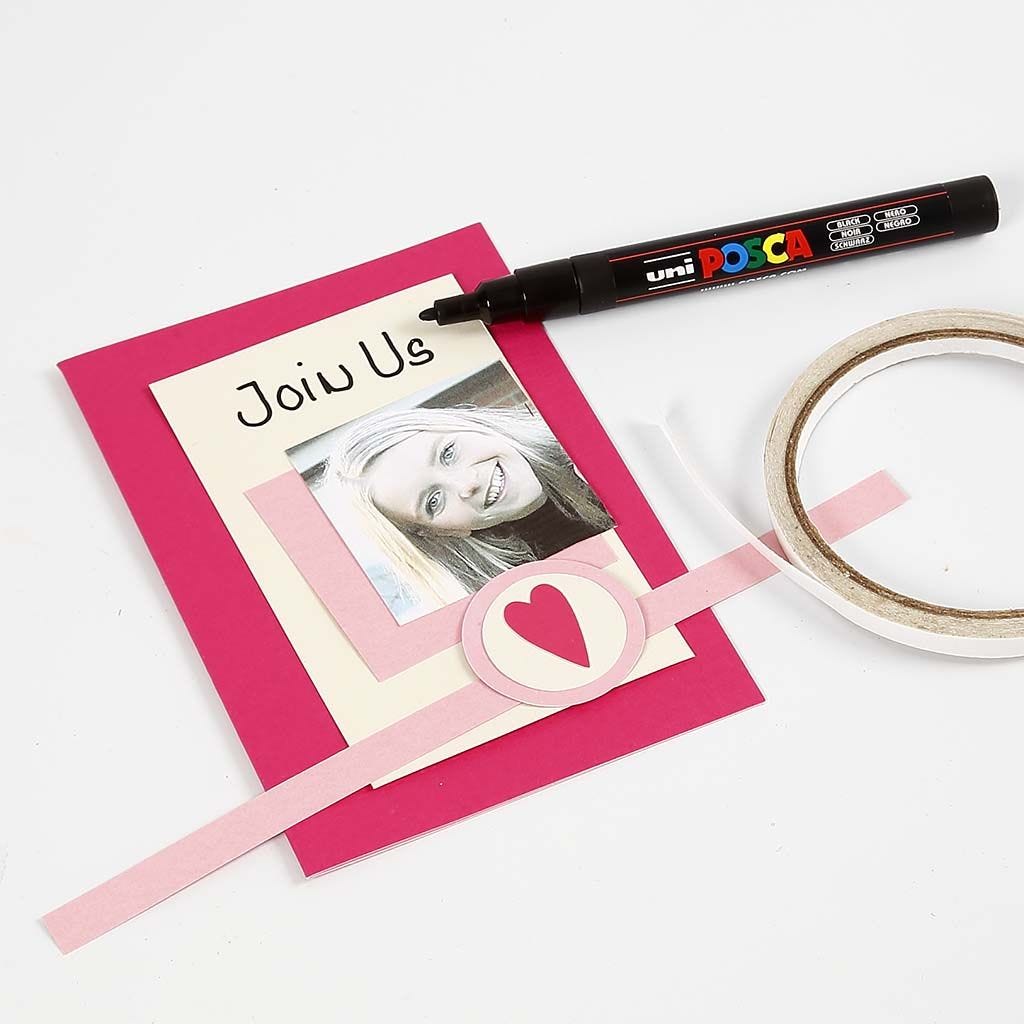 Assemble the invitation: Using the off-white card, measure and cut out a frame for all the components. Write your greeting with a black marker. Print and crop the portrait on off-white textured paper. Attach everything in layers using double-sided tape.
Assemble the invitation: Using the off-white card, measure and cut out a frame for all the components. Write your greeting with a black marker. Print and crop the portrait on off-white textured paper. Attach everything in layers using double-sided tape.7 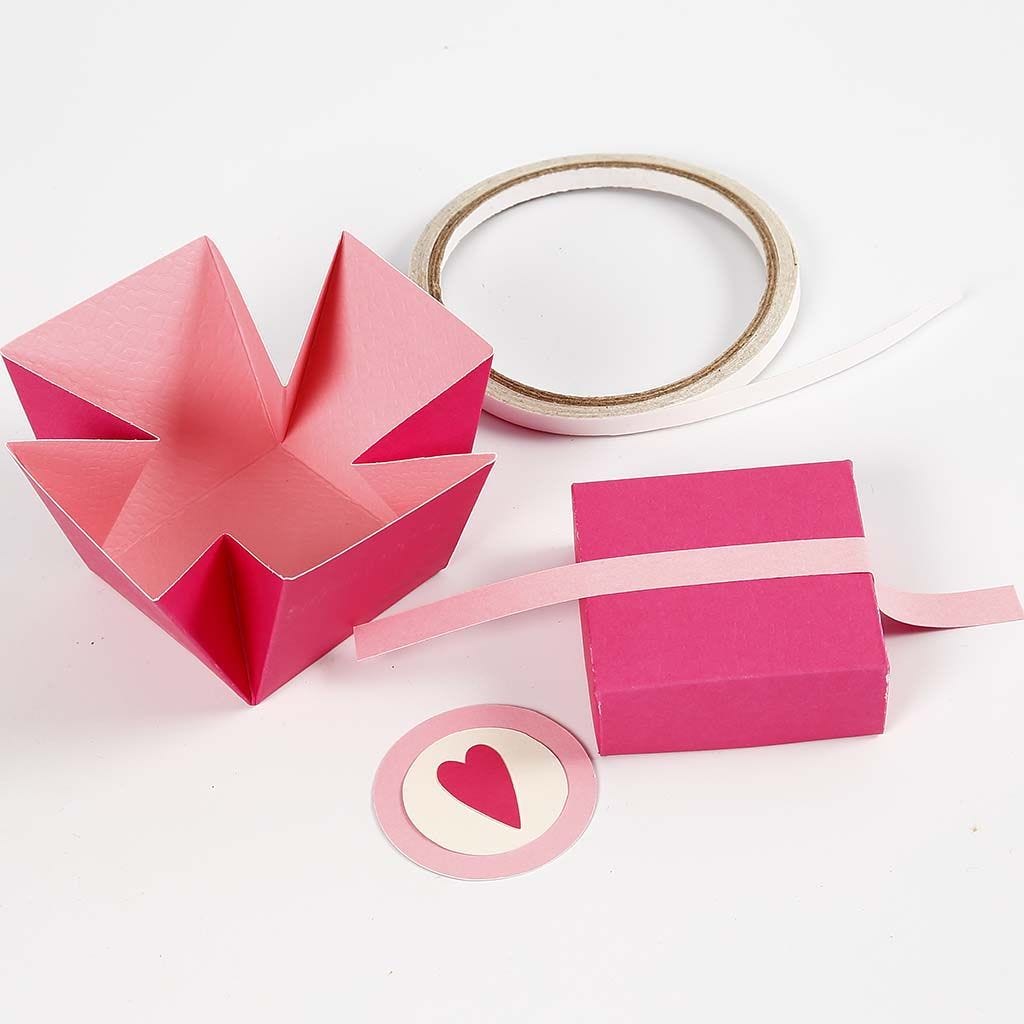 Assemble a box with lid (see instructions for this in idea 13591). Decorate the lid with the same embellishments as the invitation and card. Use double-sided tape to attach them.
Assemble a box with lid (see instructions for this in idea 13591). Decorate the lid with the same embellishments as the invitation and card. Use double-sided tape to attach them.Example 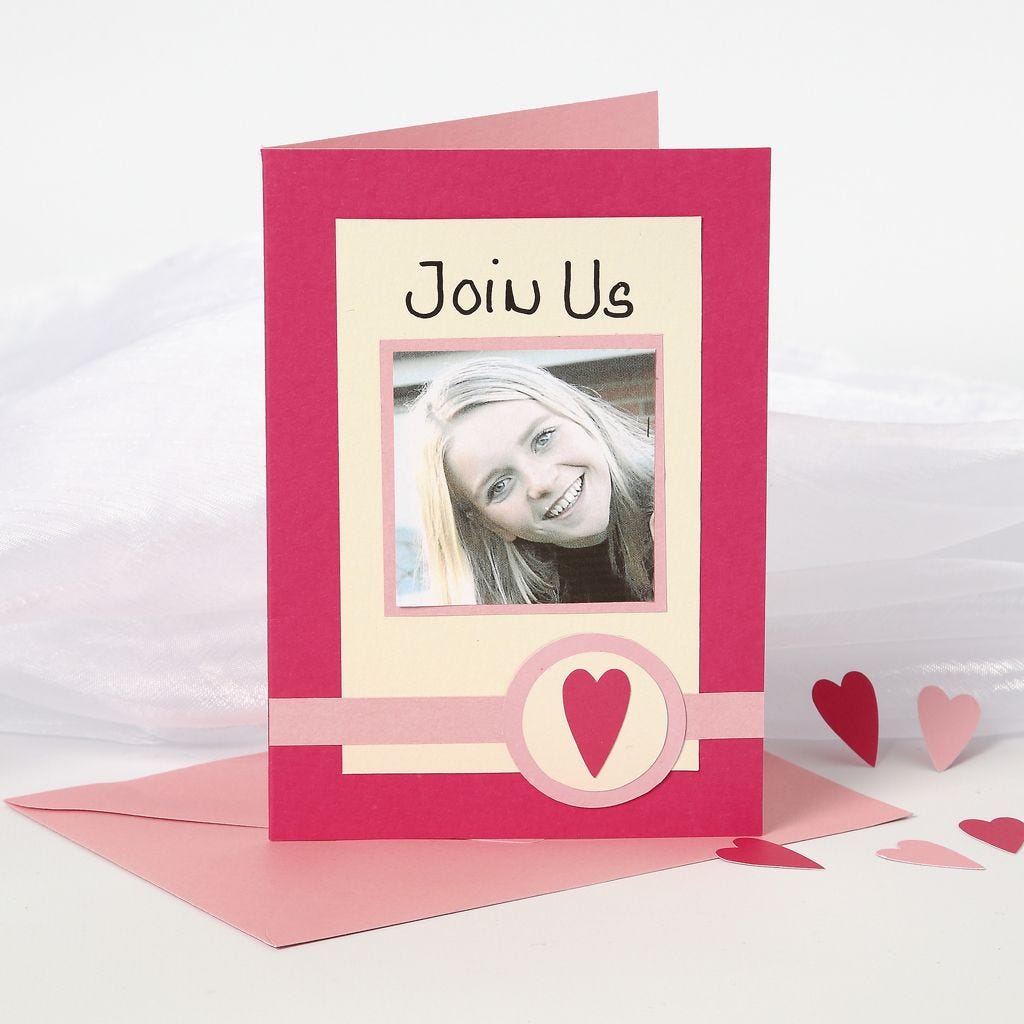 -
-
-Example 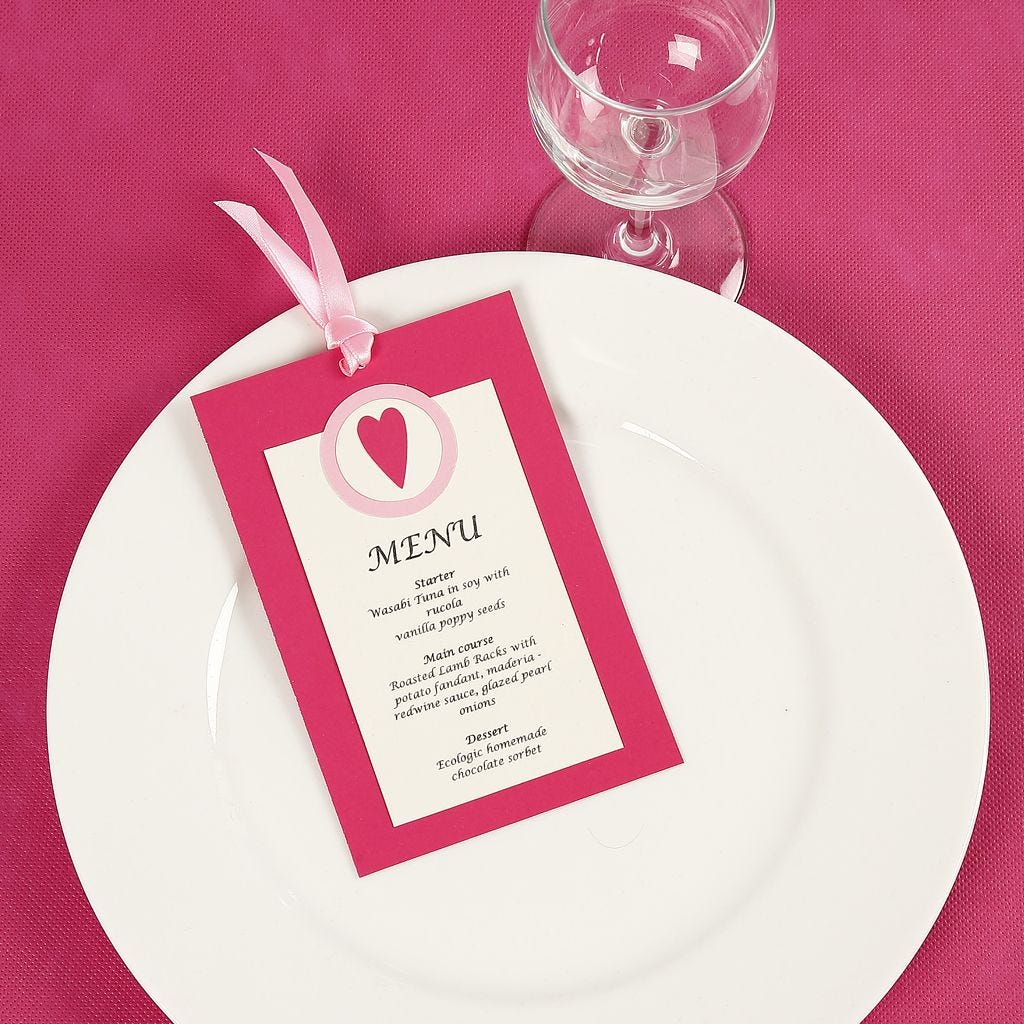 -
-
-Example 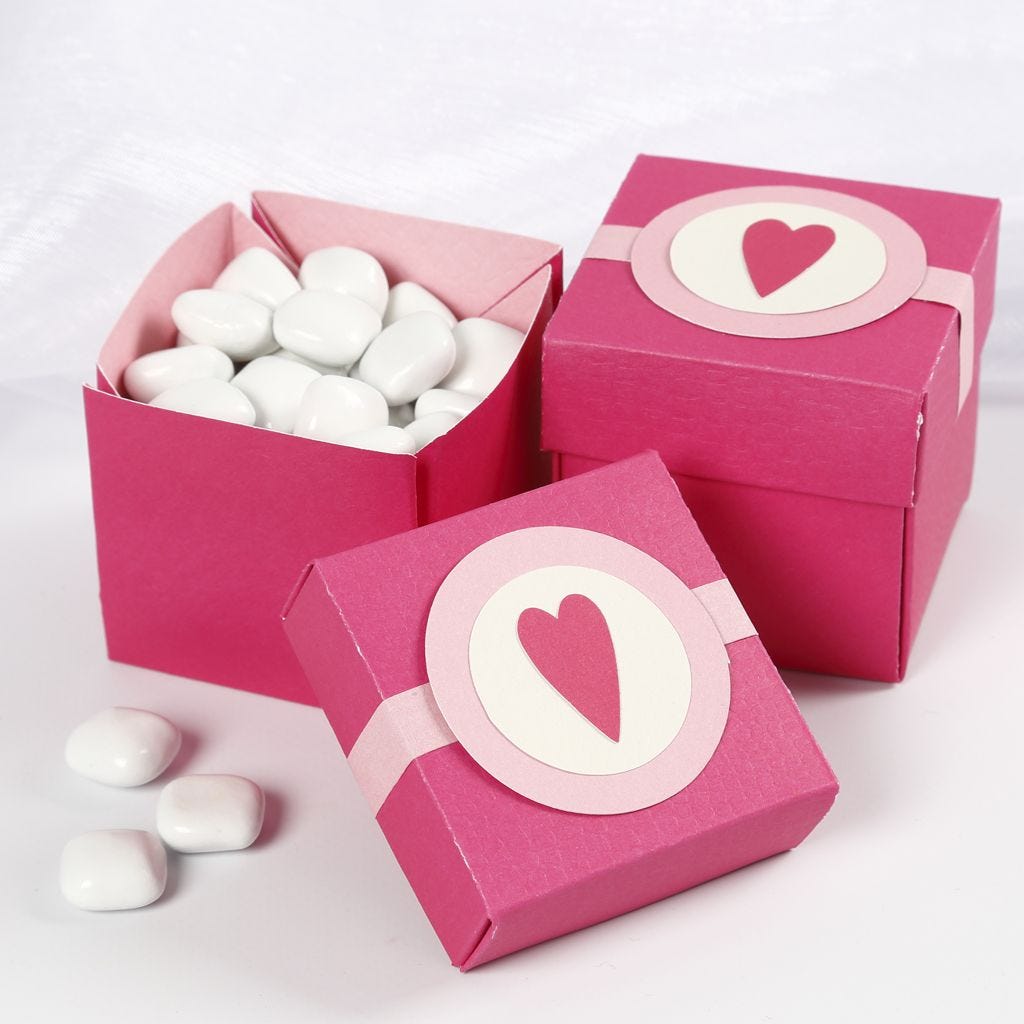 -
-
-Also go exploring in
