
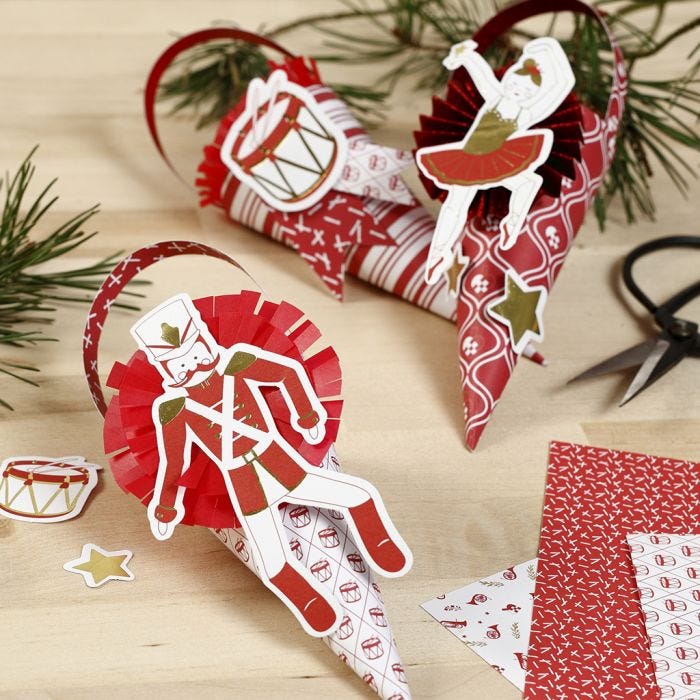
Creative idea
Cones decorated with Rosettes and Card Cut-outs from the Nutcracker Fairy Tale
#v15417
Make your own cones from design paper and decorate them with rosettes, tissue paper and card cut-outs from the Nutcracker fairy tale. Here are three ideas for beautiful Christmas cones.
#v15417
How to do it
1 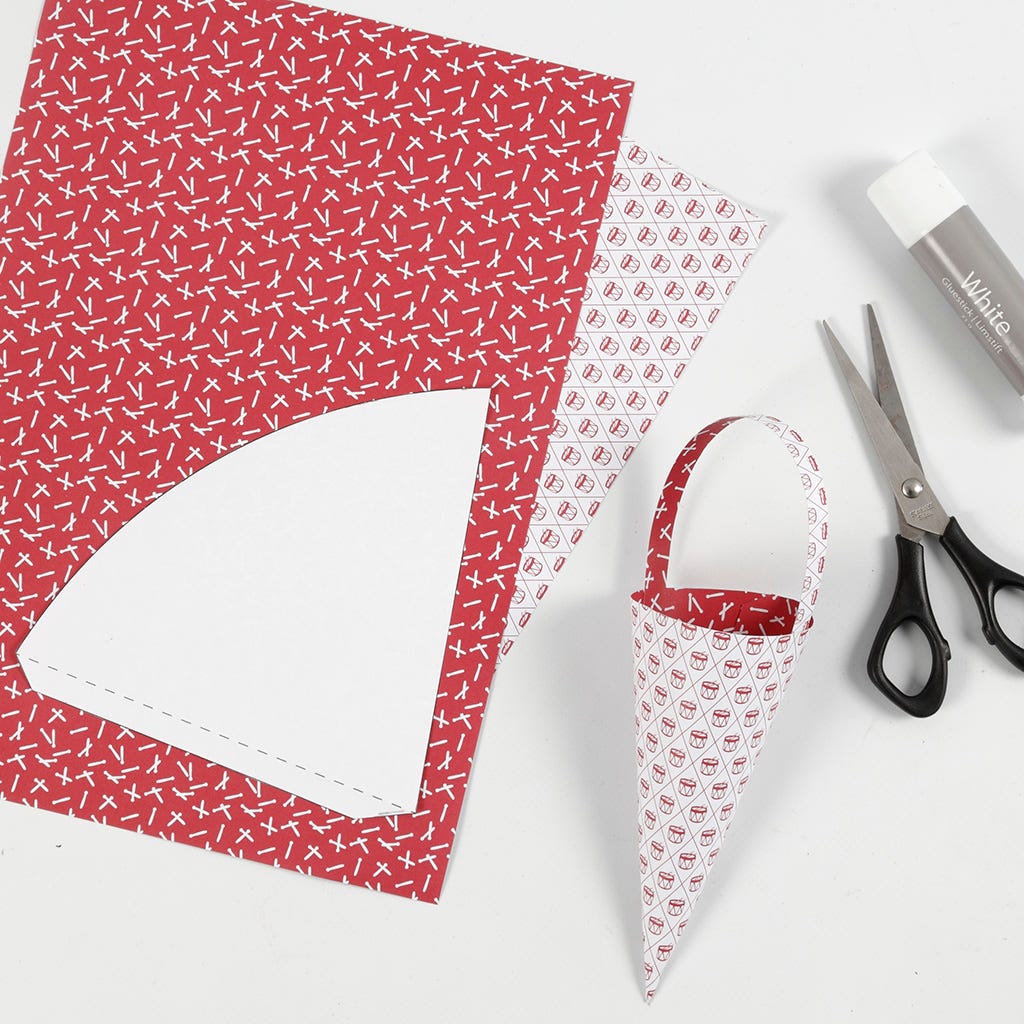 Glue two pieces of design paper together, back to back. Print the template which is available as a separate PDF on this page and copy it onto the design paper. Cut out. Now glue, stick or staple together the cone and the handle.
Glue two pieces of design paper together, back to back. Print the template which is available as a separate PDF on this page and copy it onto the design paper. Cut out. Now glue, stick or staple together the cone and the handle.2 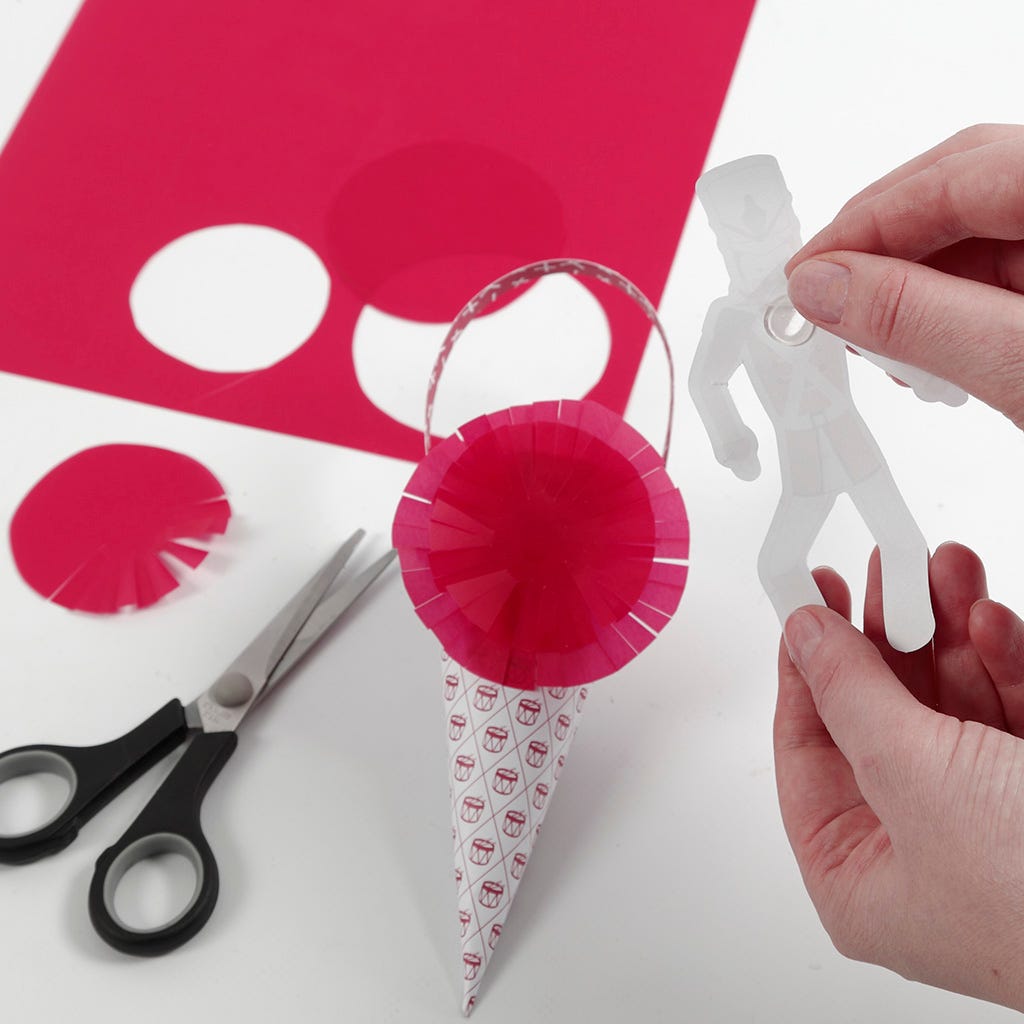 Make the Nutcracker cone by cutting out two vellum paper circles measuring 3 and 4 cm in diameter. Cut notches all the way around the edges. Glue the large circle onto the cone first and then the small one on top. Attach the Nutcracker card cut-out on top with Dodz adhesive dots.
Make the Nutcracker cone by cutting out two vellum paper circles measuring 3 and 4 cm in diameter. Cut notches all the way around the edges. Glue the large circle onto the cone first and then the small one on top. Attach the Nutcracker card cut-out on top with Dodz adhesive dots.3 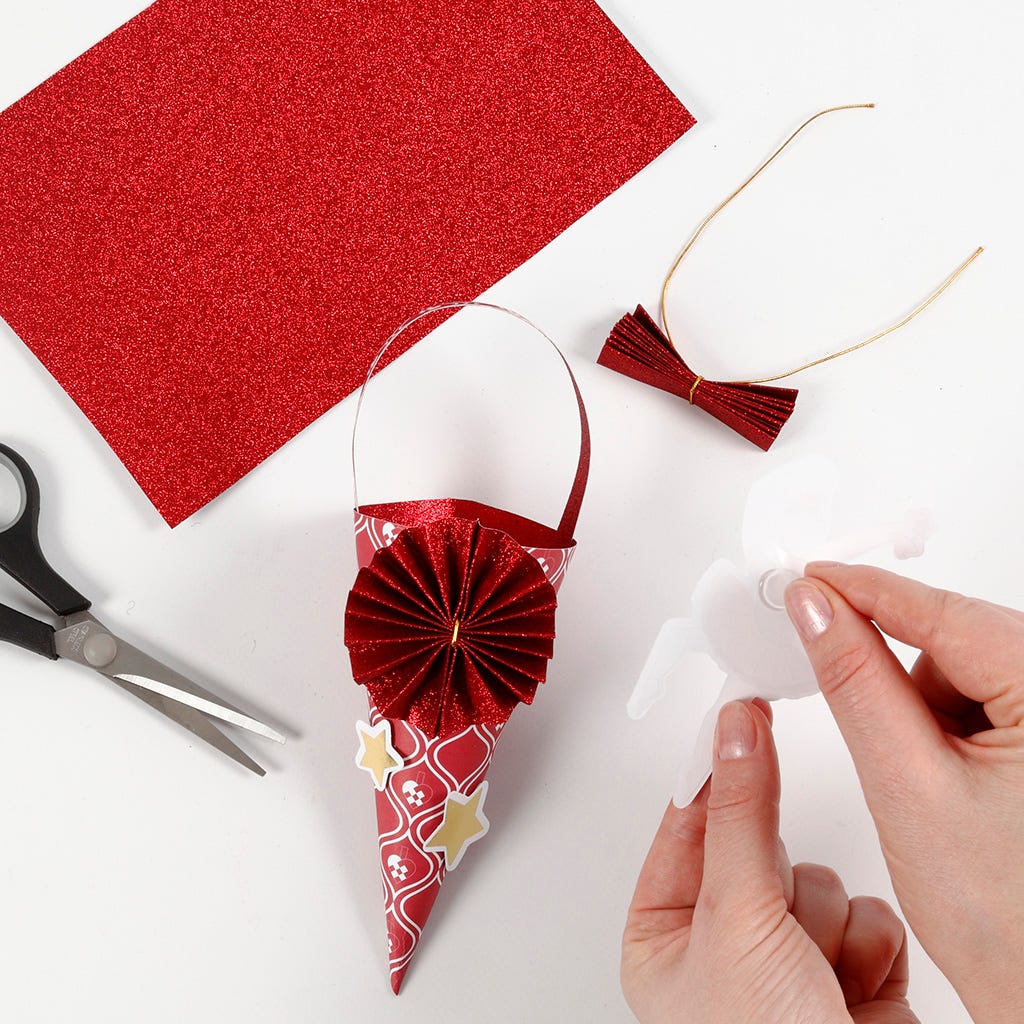 Make the rosette for the ballerina cone by cutting a 6 x 21 cm piece of glitter paper. Fold it in a concertina fashion, each fold measuring approx. 1 cm in width. Tie a piece of gold thread around the middle. Bend the concertina in the middle and assemble the ends with double-sided adhesive tape, making a rosette. Attach the rosette onto the cone with Dodz adhesive dots and attach the ballerina card cut-out on top with a Dodz adhesive dot.
Make the rosette for the ballerina cone by cutting a 6 x 21 cm piece of glitter paper. Fold it in a concertina fashion, each fold measuring approx. 1 cm in width. Tie a piece of gold thread around the middle. Bend the concertina in the middle and assemble the ends with double-sided adhesive tape, making a rosette. Attach the rosette onto the cone with Dodz adhesive dots and attach the ballerina card cut-out on top with a Dodz adhesive dot.4 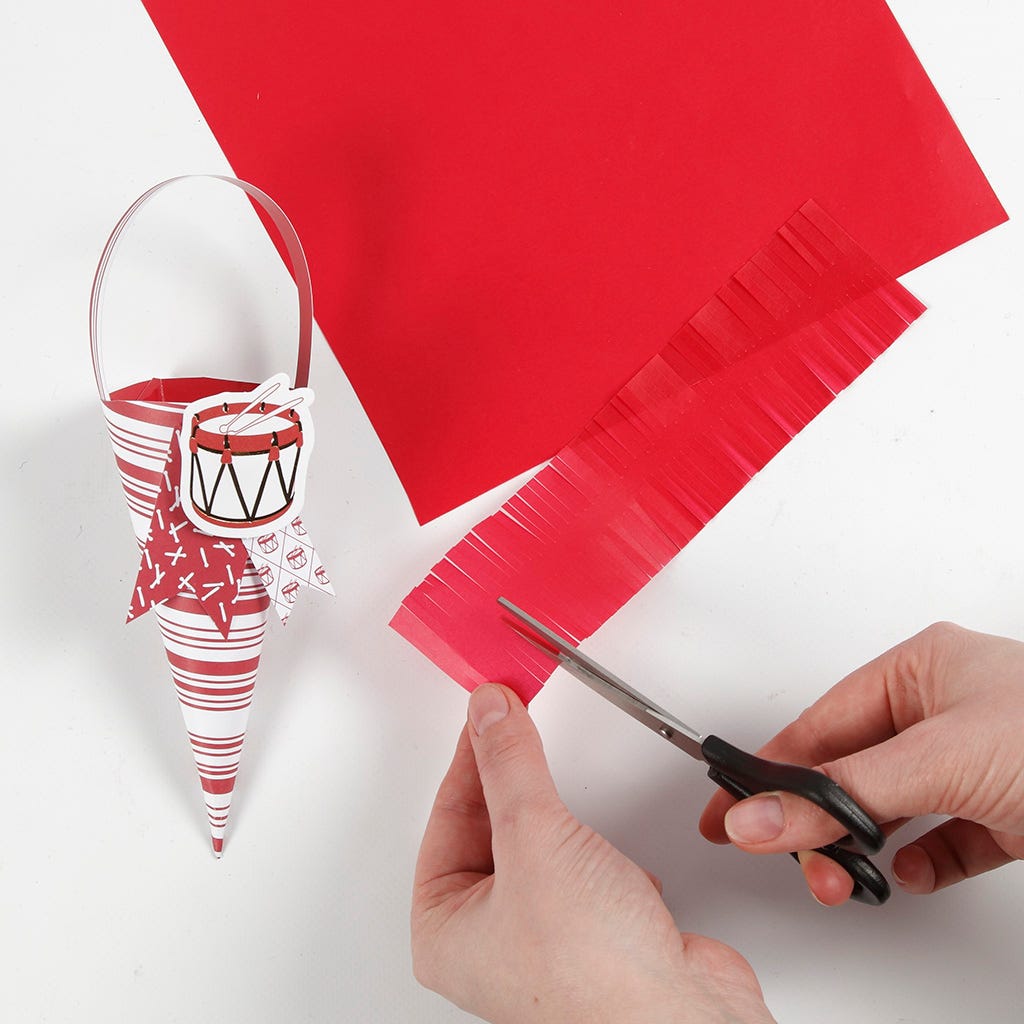 Make the cone with the drum and the flags by cutting two pieces of design paper; one measuring 3 x 6 cm and the other 2 x 6 cm. Cut a triangle shape at the bottom of both pieces of design paper and glue them onto the cone. Glue the drum card cut-out on top. Make the fringe from a 4 x 20 cm piece of vellum paper. Cut notches along both sides.
Make the cone with the drum and the flags by cutting two pieces of design paper; one measuring 3 x 6 cm and the other 2 x 6 cm. Cut a triangle shape at the bottom of both pieces of design paper and glue them onto the cone. Glue the drum card cut-out on top. Make the fringe from a 4 x 20 cm piece of vellum paper. Cut notches along both sides.5 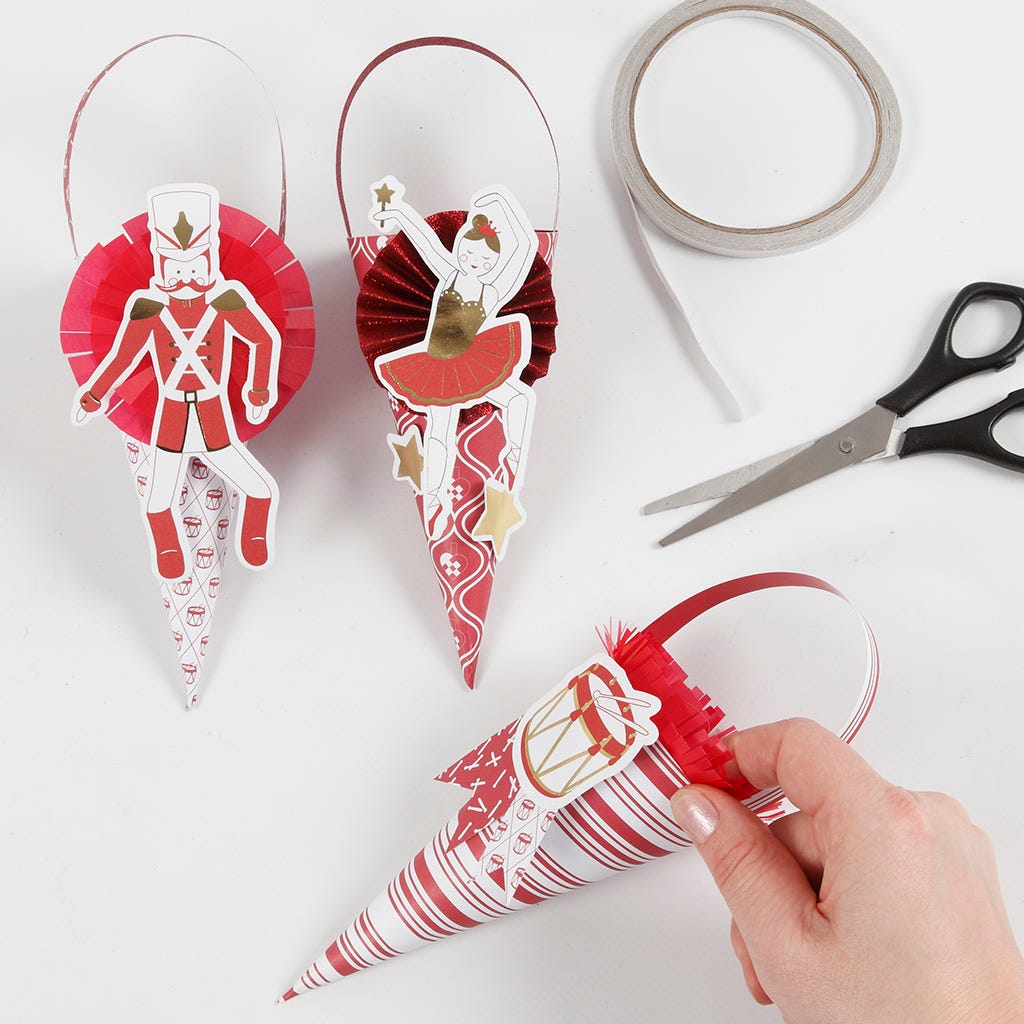 Fold the fringed piece of vellum paper in half and glue together so that the fringes are doubled. Glue this strip of fringed vellum paper onto the inside of the cone.
Fold the fringed piece of vellum paper in half and glue together so that the fringes are doubled. Glue this strip of fringed vellum paper onto the inside of the cone.Template  -
-
-Also go exploring in
