
5576b60fe480d.jpg)
Creative idea
Colourful Cards - Life's Celebrations
#v12299
The paper is torn, cut and glued onto the card. The stars are decorated with rocaille beads on silver-plated wire and are attached to the card with 3D foam pads.
#v12299
How to do it
1. 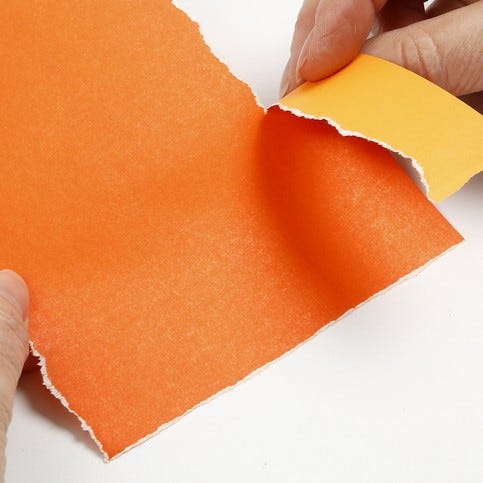 Tear the paper, so the white core is visible. The size of this piece is slightly smaller than the card.
Tear the paper, so the white core is visible. The size of this piece is slightly smaller than the card.2. 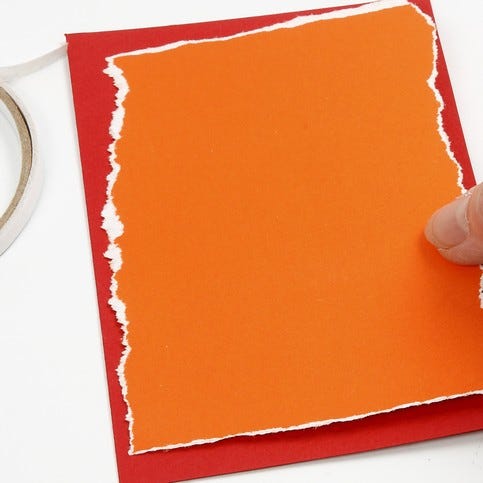 Attach this piece onto the card with double-sided adhesive tape.
Attach this piece onto the card with double-sided adhesive tape.3. 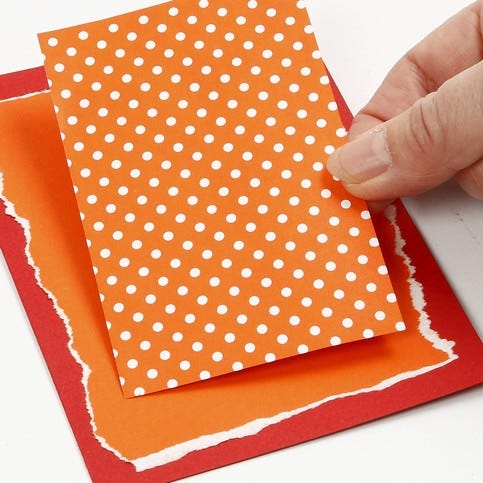 Cut a piece of dotted paper slightly smaller than the torn piece of paper. Attach this onto the torn piece of paper using double-sided adhesive tape.
Cut a piece of dotted paper slightly smaller than the torn piece of paper. Attach this onto the torn piece of paper using double-sided adhesive tape.4. 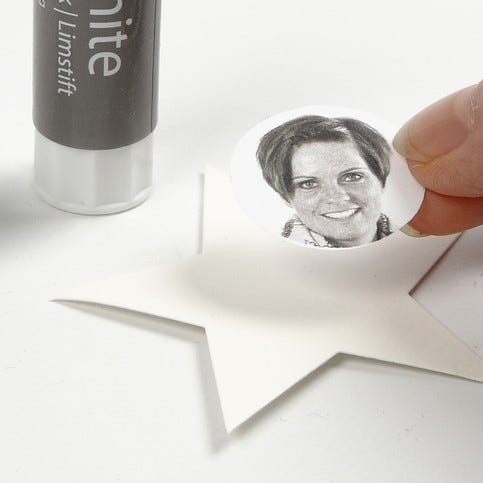 Print a photo and glue this onto the little star.
Print a photo and glue this onto the little star.5. 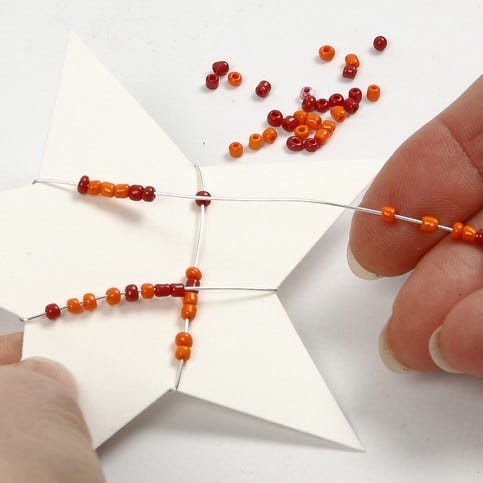 Thread rocaille beads onto the silver-plated wire and wrap it around the large star. There should be no beads on the back of the star.
Thread rocaille beads onto the silver-plated wire and wrap it around the large star. There should be no beads on the back of the star.6. 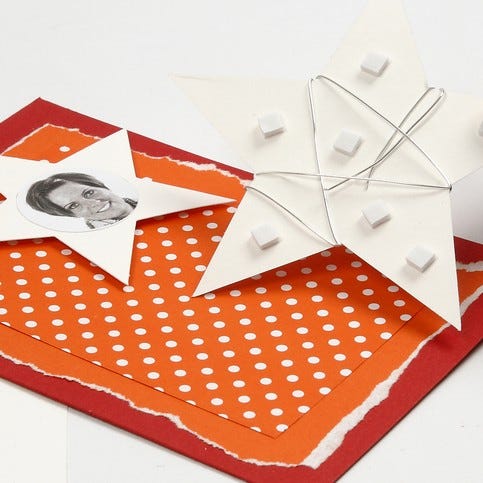 Attach the stars onto the card with 3D foam pads.
Attach the stars onto the card with 3D foam pads.7. 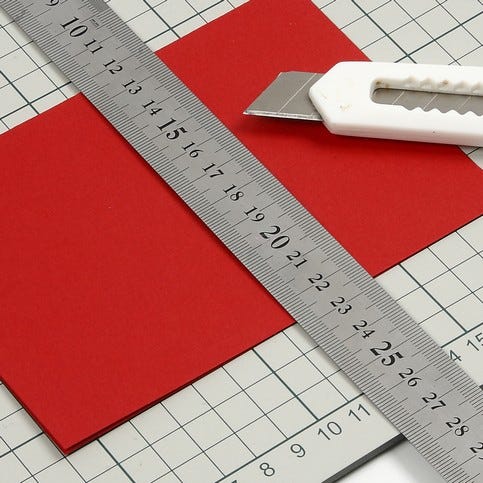 Divide a card into two for a menu card and a place card. If a large number of place cards is required, divide the card into three.
Divide a card into two for a menu card and a place card. If a large number of place cards is required, divide the card into three.8. 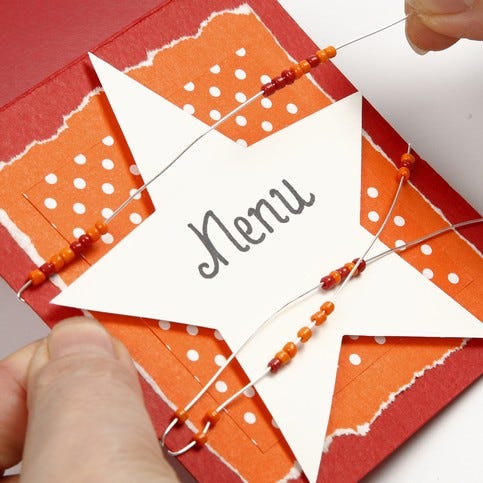 Assemble the menu card following the same procedure as when making the invitation. However, wrap the silver-plated wire around the entire front of the card.
Assemble the menu card following the same procedure as when making the invitation. However, wrap the silver-plated wire around the entire front of the card.9. 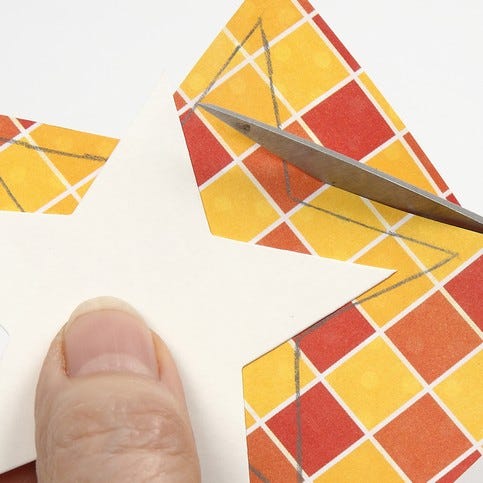 Use a small star as a template when cutting a slightly bigger star from Color Bar paper.
Use a small star as a template when cutting a slightly bigger star from Color Bar paper.10. 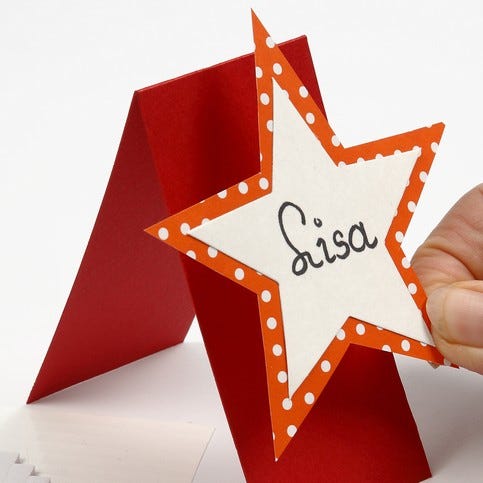 Assemble with double-sided adhesive tape. Attach this onto a small card using 3D foam pads. The place card may stand on the table, but if you wish to hang it onto a glass, cut a bit off the flap at the back of the card.
Assemble with double-sided adhesive tape. Attach this onto a small card using 3D foam pads. The place card may stand on the table, but if you wish to hang it onto a glass, cut a bit off the flap at the back of the card.Also go exploring in
