
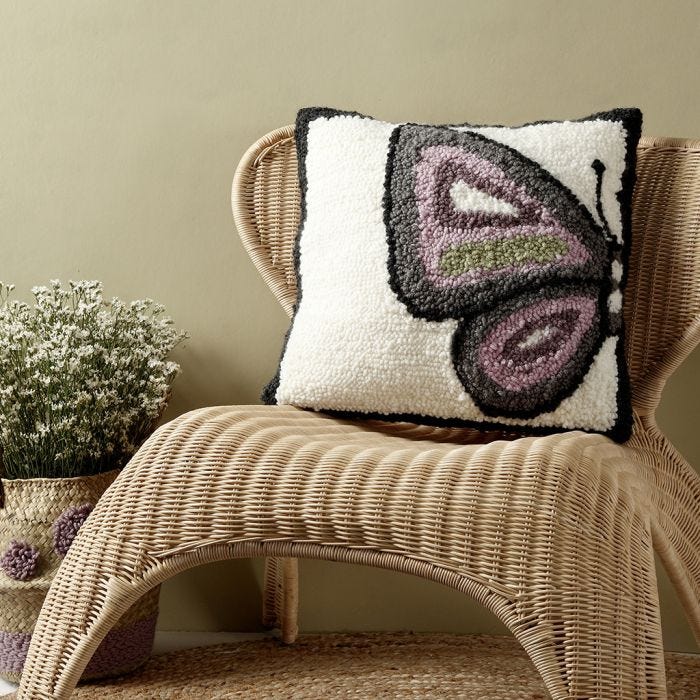
Creative idea
A cushion with a butterfly design made with a punch needle
#v15706
Make your own cushion with a needle-punched embroidery. This design is embroidered with wool on aida fabric and then attached to a pillowcase.
#v15706
How to do it
1 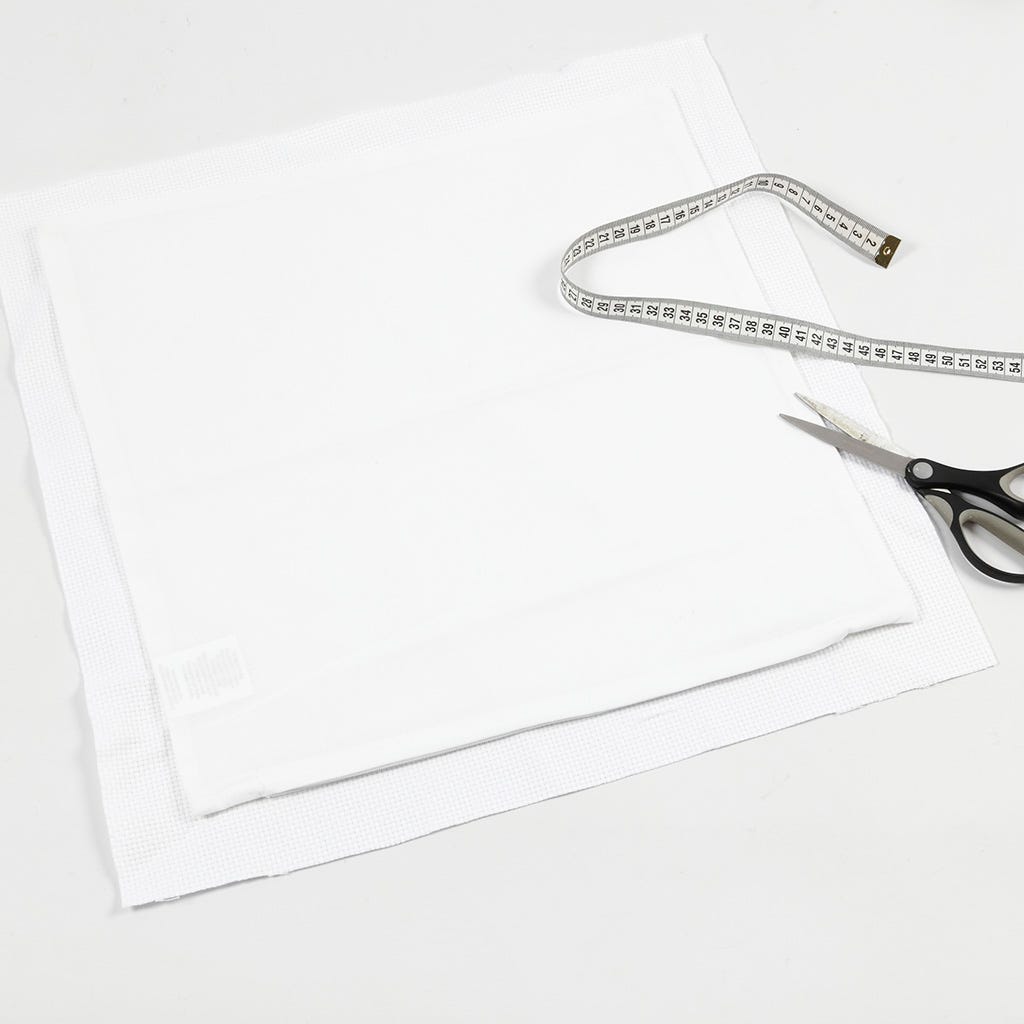 Cut the aida fabric approx. 4 cm larger (all round) than the pillowcase. Copy the circumference of the pillowcase onto the aida fabric making the frame visible.
Cut the aida fabric approx. 4 cm larger (all round) than the pillowcase. Copy the circumference of the pillowcase onto the aida fabric making the frame visible.2 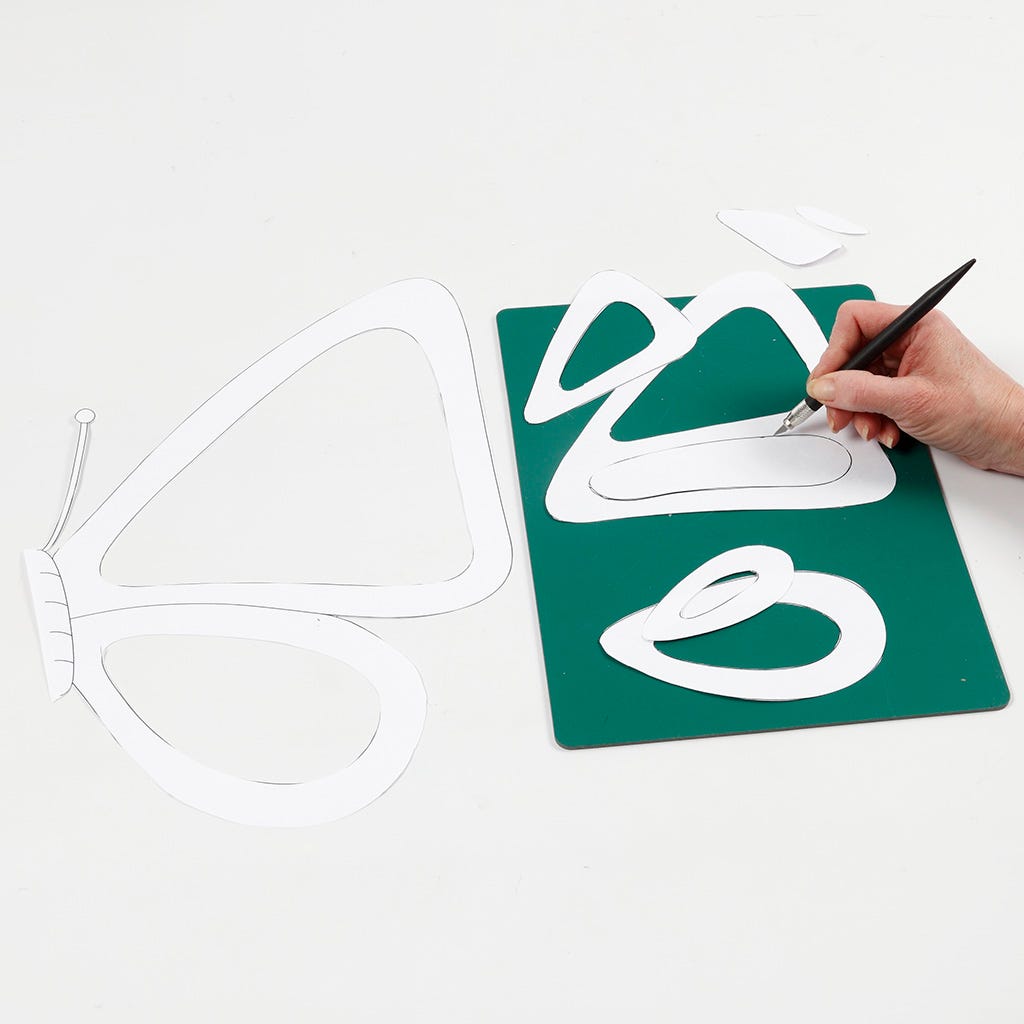 Print out the template which is available as a PDF file on this page. The template comes in two sheets of paper. Tape them together and cut out the individual parts of the butterfly as shown in the photo.
Print out the template which is available as a PDF file on this page. The template comes in two sheets of paper. Tape them together and cut out the individual parts of the butterfly as shown in the photo.3 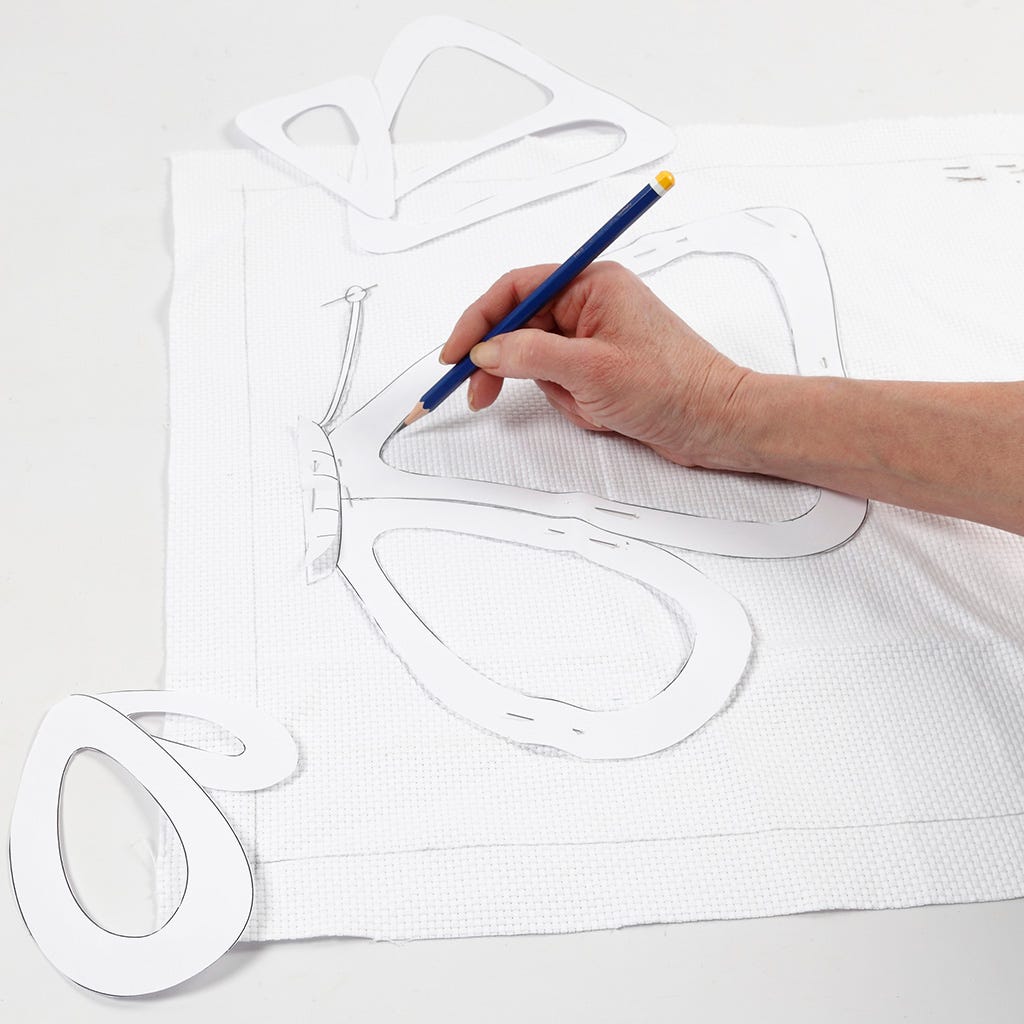 Place the butterfly template 2 cm from the pencil border on the aida fabric. Copy all the parts onto the aida fabric using a pencil. Also draw another line 2 cm inside the border to make a frame.
Place the butterfly template 2 cm from the pencil border on the aida fabric. Copy all the parts onto the aida fabric using a pencil. Also draw another line 2 cm inside the border to make a frame.4 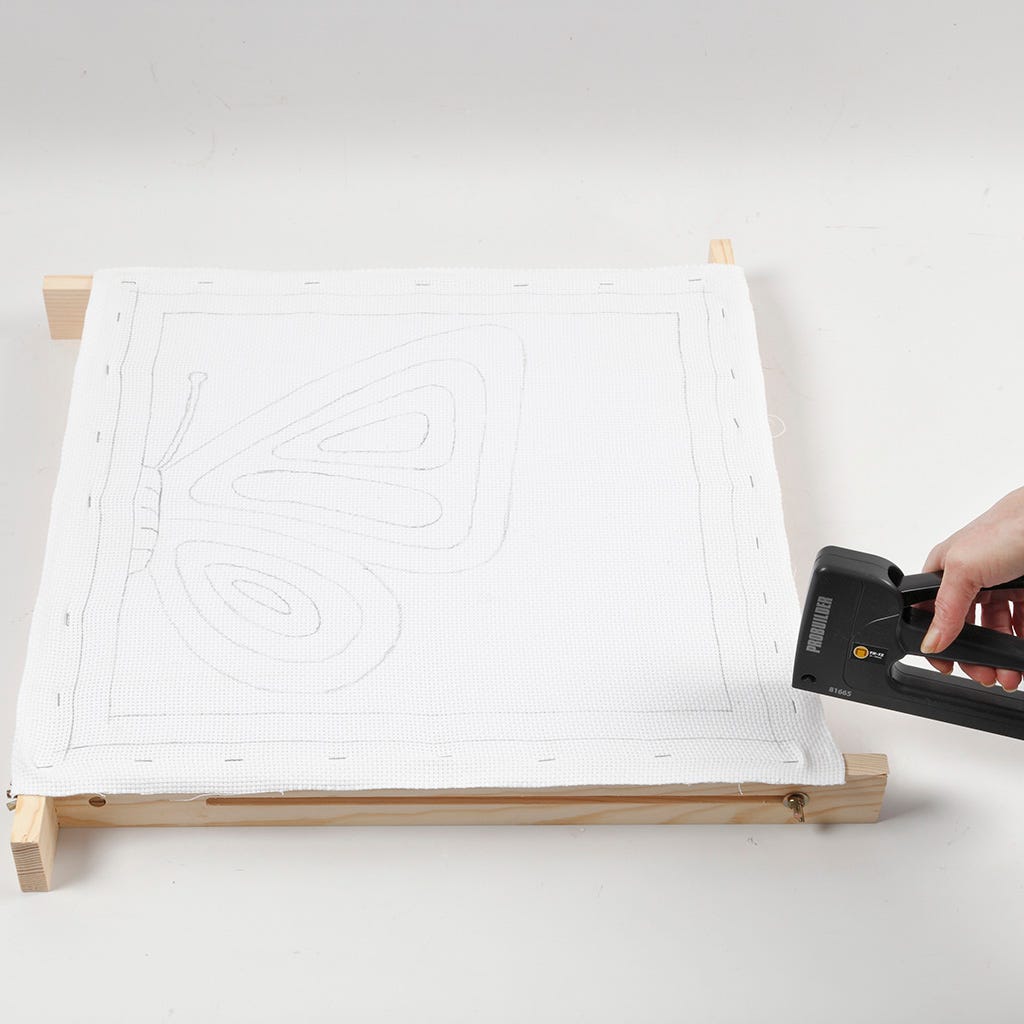 Assemble the multi frame to fit the aida fabric. Make sure that the outside pencil-drawn border is within the multi frame, enabling you to needle punch through that area. Attach the aida fabric onto the frame using an Ergo stapler. First staple each corner then staple the space in between the corners. Pull the fabric taut prior to stapling.
Assemble the multi frame to fit the aida fabric. Make sure that the outside pencil-drawn border is within the multi frame, enabling you to needle punch through that area. Attach the aida fabric onto the frame using an Ergo stapler. First staple each corner then staple the space in between the corners. Pull the fabric taut prior to stapling.5  Thread the punch needle following the instructions on the packaging. Adjust the needle to setting D for the border and the background. Always make sure to have unwound loose wool. Begin with a border all the way round. Punch into every other hole in each row.
Thread the punch needle following the instructions on the packaging. Adjust the needle to setting D for the border and the background. Always make sure to have unwound loose wool. Begin with a border all the way round. Punch into every other hole in each row.6 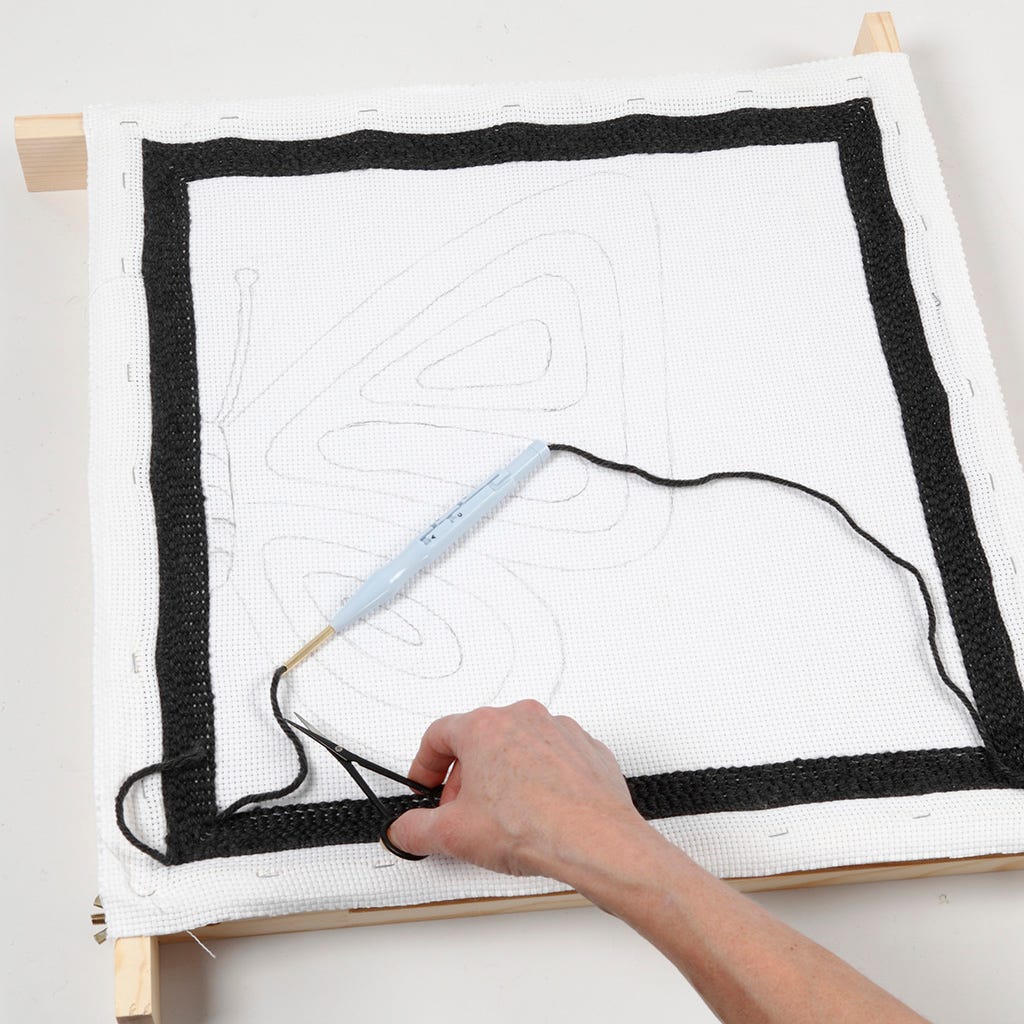 Cut the yarn when the border is 2 cm wide. Needle punch the butterfly with the punch needle adjusted to setting B. When you have finished the butterfly, fill in the background with setting D.
Cut the yarn when the border is 2 cm wide. Needle punch the butterfly with the punch needle adjusted to setting B. When you have finished the butterfly, fill in the background with setting D.7 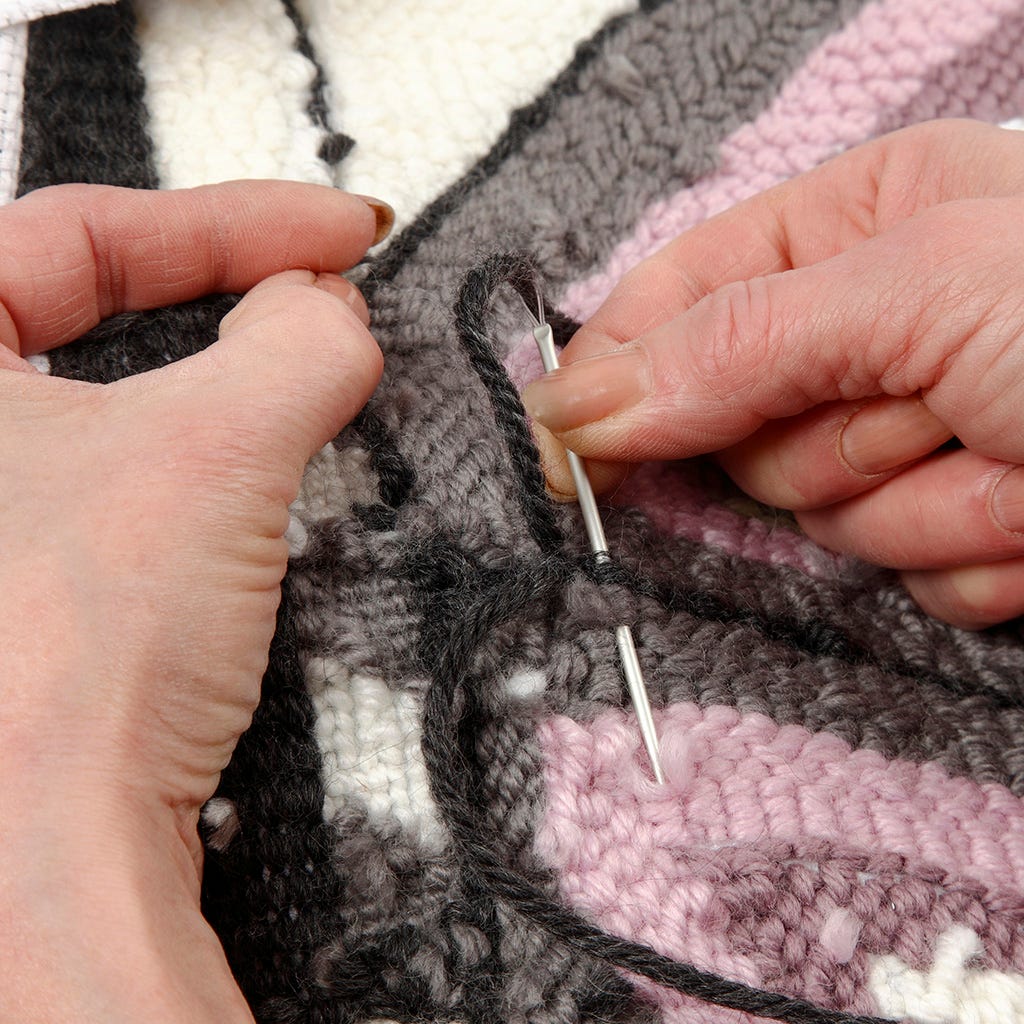 Remove the aida fabric from the multi frame. Secure all the ends very carefully using a yarn needle. Alternatively you may trim the ends to 3-4 cm and secure the ends onto the back using decoupage lacquer for fabric.
Remove the aida fabric from the multi frame. Secure all the ends very carefully using a yarn needle. Alternatively you may trim the ends to 3-4 cm and secure the ends onto the back using decoupage lacquer for fabric.8 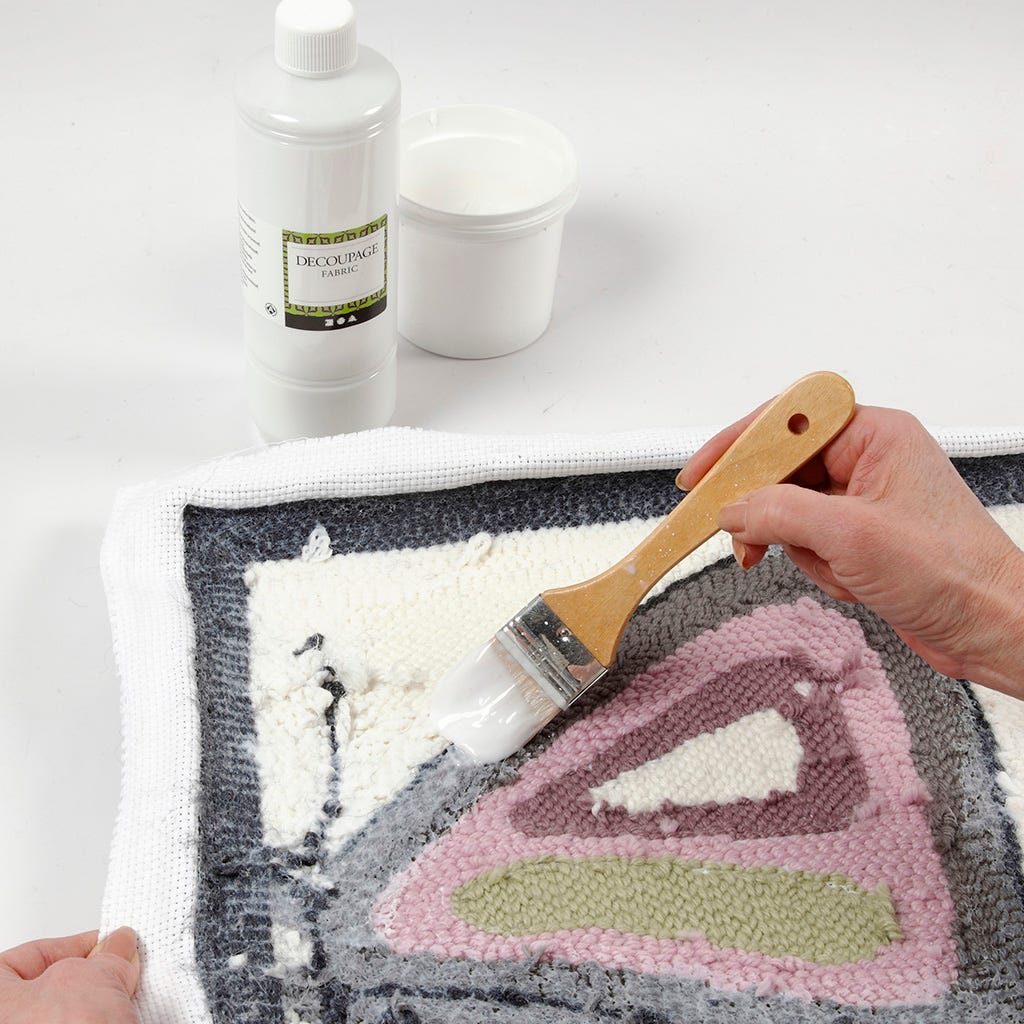 Fix the back of the needle-punched aida fabric with a thick coat of decoupage lacquer for fabric and leave to dry.
Fix the back of the needle-punched aida fabric with a thick coat of decoupage lacquer for fabric and leave to dry.9 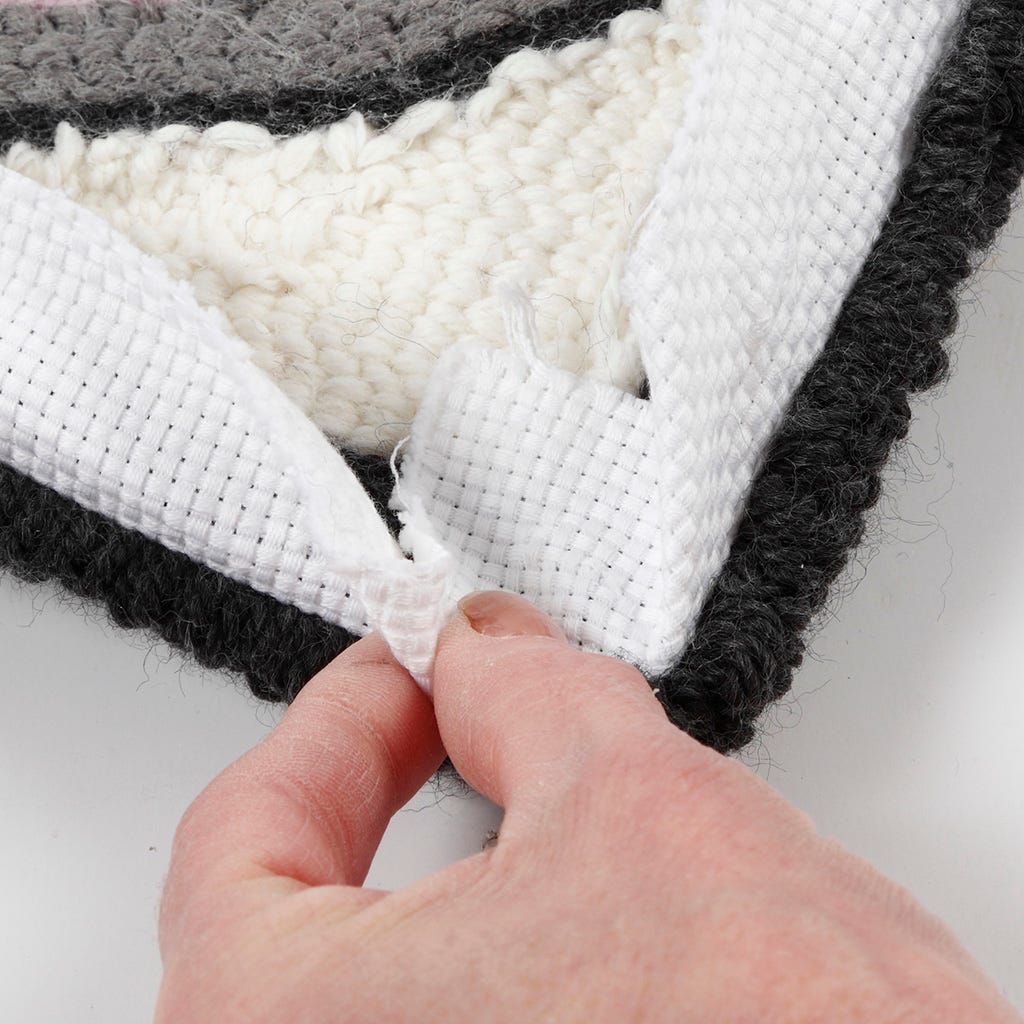 Fold in the corners as shown in the photo.
Fold in the corners as shown in the photo.10 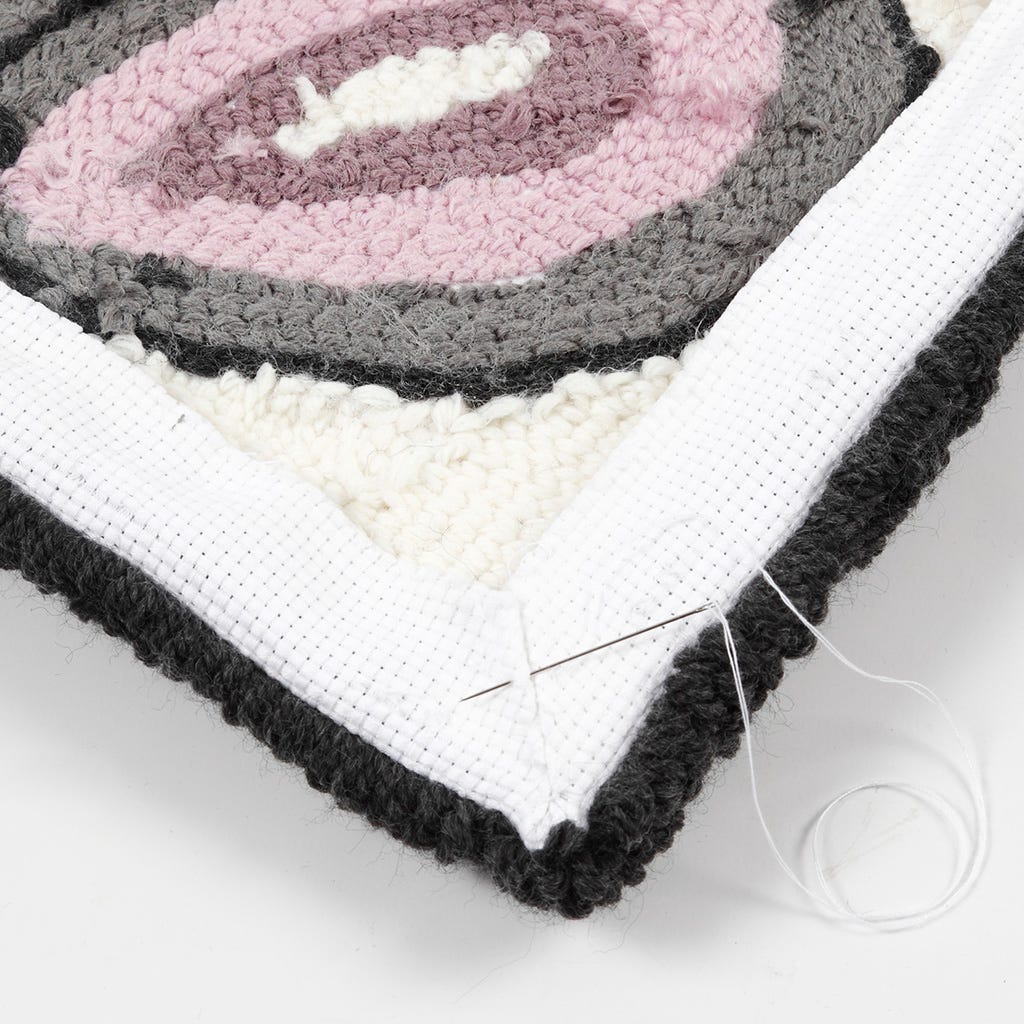 Sew the corner together for a beautiful finish.
Sew the corner together for a beautiful finish.11 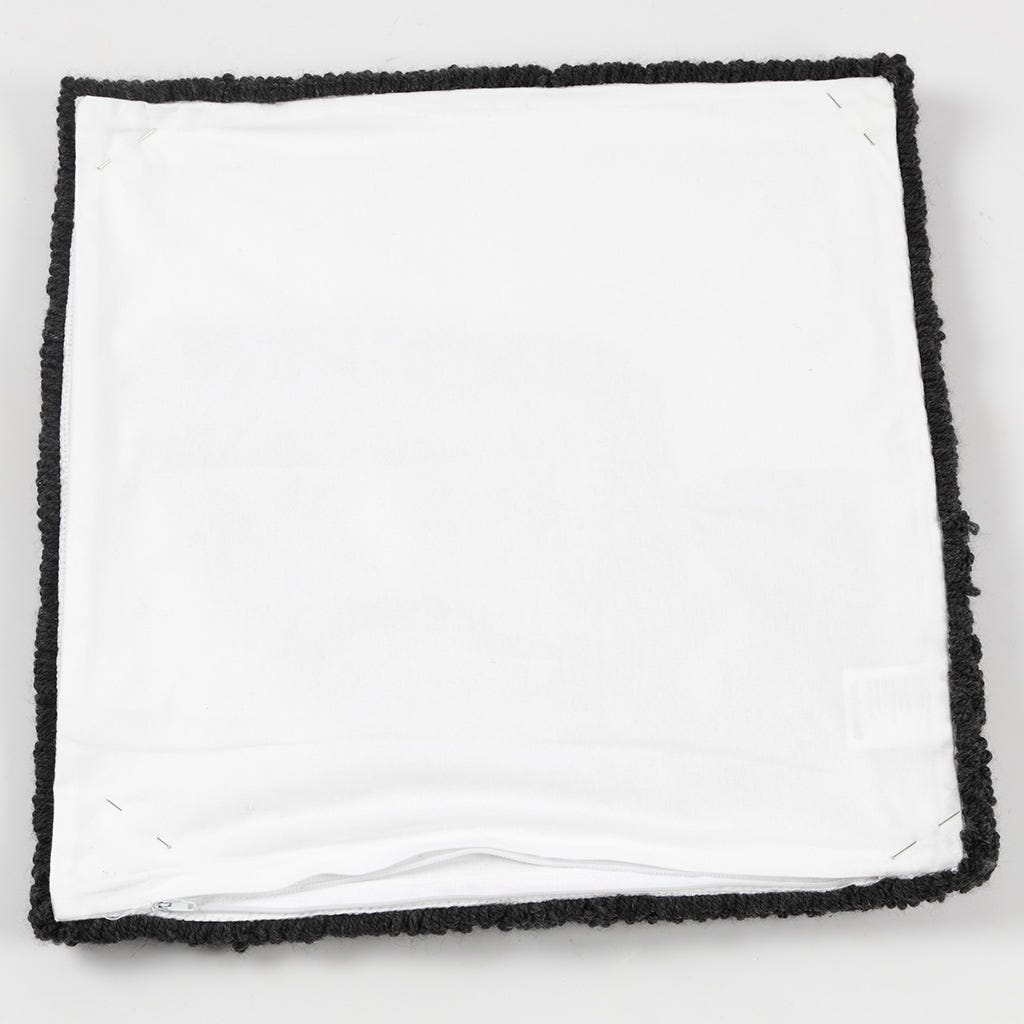 Place the pillowcase on top of the back of the aida fabric and attach it temporarily with pins.
Place the pillowcase on top of the back of the aida fabric and attach it temporarily with pins.12 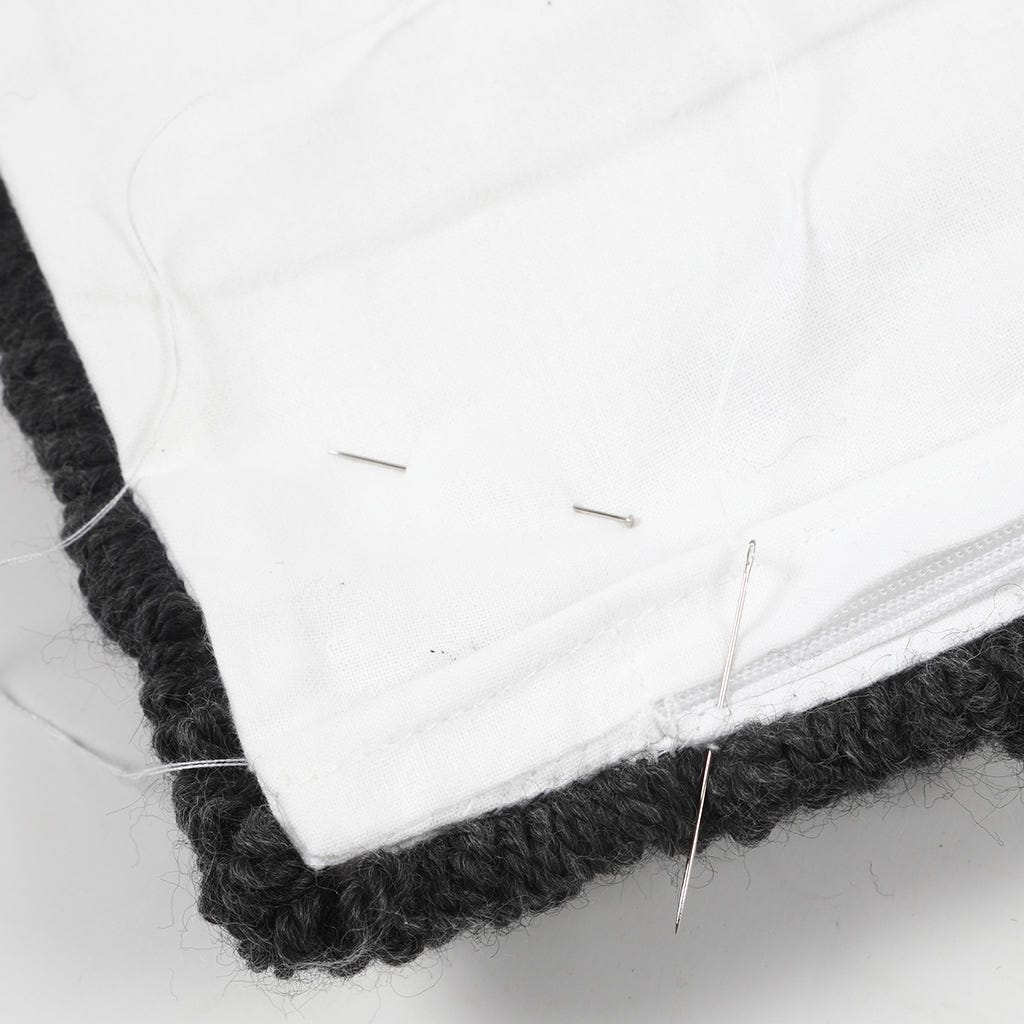 Sew the pillowcase onto the aida fabric. Leave the opening with the zip in order to insert the stuffed pillow.
Sew the pillowcase onto the aida fabric. Leave the opening with the zip in order to insert the stuffed pillow.Template  -
-
-Also go exploring in
